
 Origami is a wonderful world of creativity. Here ordinary paper is folded in a special way to produce wonderful products. And long ago the technique has changed, because experiments - it is always fascinating. Now origami products are obtained not only from white, but also from colored paper, supplement them with different accessories. Therefore, you can immediately guess what kind of object is modeled. And do not think that young children origami creativity is not under force, that it will be difficult for them to fold the details, that it is impossible to find an easy craft for kindergarten. For example, in this lesson is just such an easy option - origami bunny. And you can make not the whole hare as a whole, but only his face. Children will like such creativity. Everyone knows well that all sorts of handicrafts develop attention and perseverance. Therefore, even rare and short sessions will definitely bear fruit.
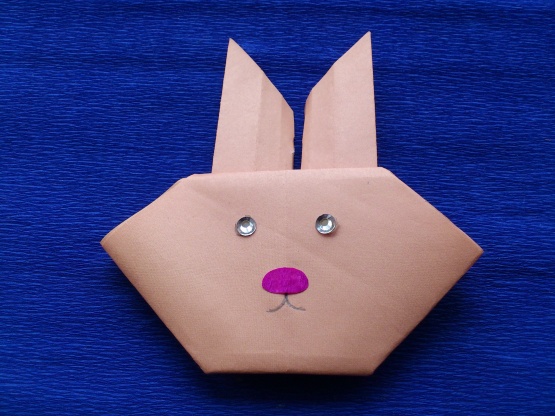
This lesson shows you how to make an origami bunny face. To get a handicraft it is enough to make a few folds, and later add eyes and nose. All stages are quite easy for children of kindergarten age.
What you need to make the same origami bunny:
- A piece of paper - beige was used here, but it can be white or gray or blue or pink;
- Two half beads in blue or black;
- A drop of pink paper for the spout;
- Black pen;
- Glue if necessary.
[H3]How to make an origami bunny[/H3]
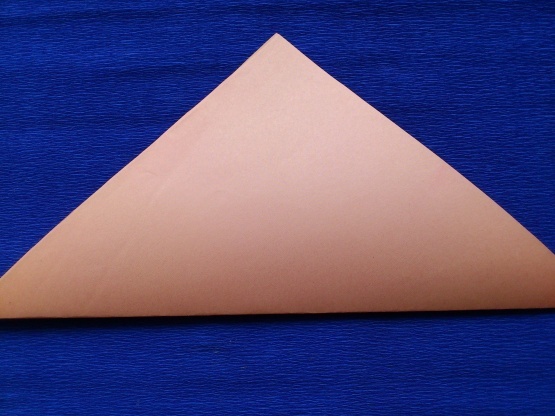
1. Cut a square out of paper (it can be one-sided or two-colored). Most often it is squares that are used in modeling all kinds of origami crafts. Start the handicraft from the first diagonal bend of the square.
2. Make the second bend in the same way, but along the second diagonal. In this way, you will have a cross in the center.
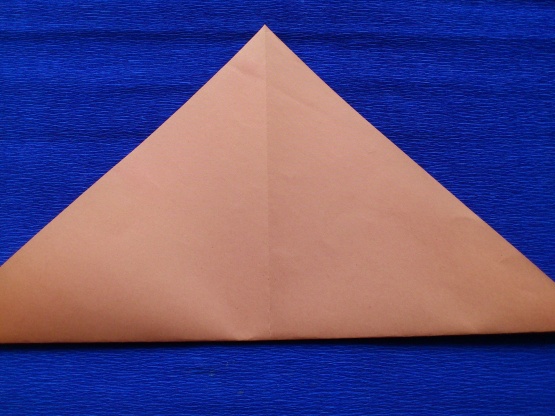
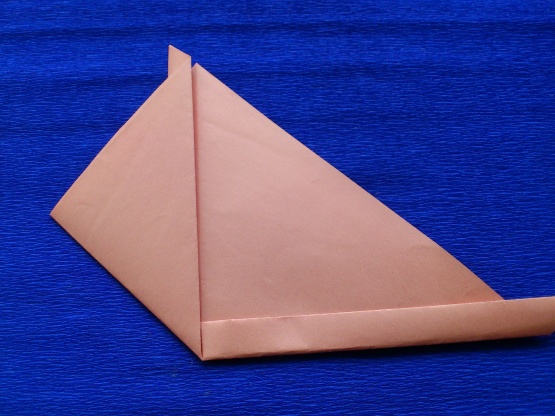
3. Leave the piece as a double folded triangle. Make the third fold - raise the bottom side of the square by about 1 cm. In this case, this side will be the longest. Press all the folds together.
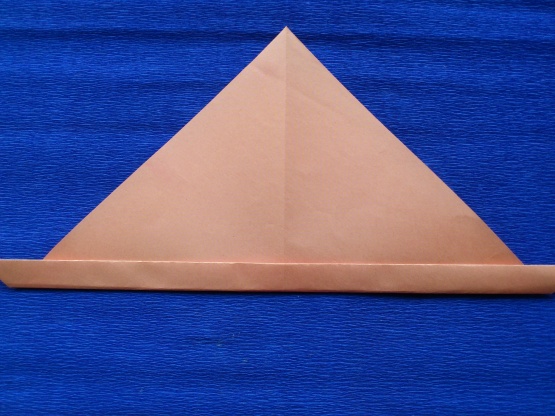
4. Using the center crease left after folding the square in the first step, fold up one side of the piece first. Be sure to clearly align the height of the square (fold) with the bottom side.
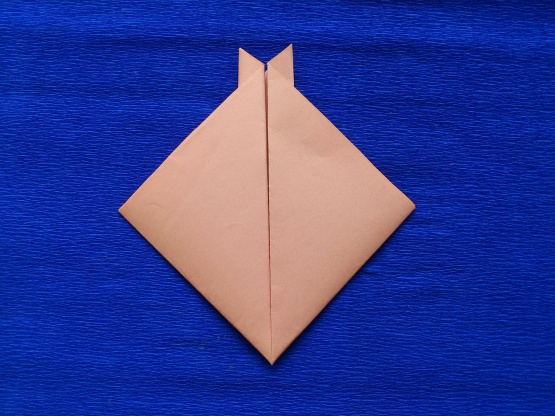
5. Then in the same way symmetrically lift the second part of the triangle, in the center both parts should be clearly aligned. The top will be the bunny's ears.
6. If you don't think the ears are long enough, you can trim them further. Pull the top layer down a little after cutting. If the paper does not hold well, use glue.
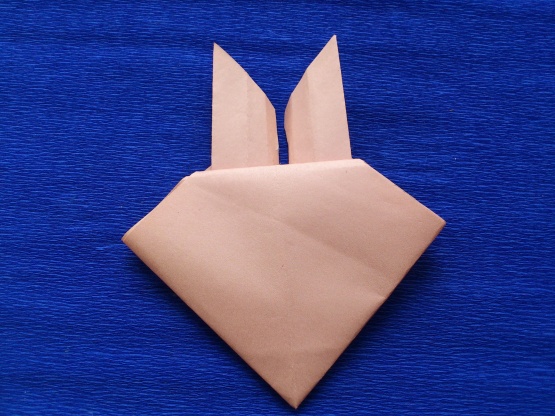
7. Bring the bottom part (corner) up, but make a fold under the bottom. Thus, you will highlight a wide bunny face with two ears. This will be the desired origami paper craft. Now you need to draw or glue the eyes. Use half beads or something else that is at hand. Glue a pink spout cut from a small piece of paper. Also draw a mouth.
That's it. Such very simple and clear stages of work are given here. Will the kids be able to cope with such a task? Of course, because a few folds turn an ordinary square piece of paper into a bunny.


