
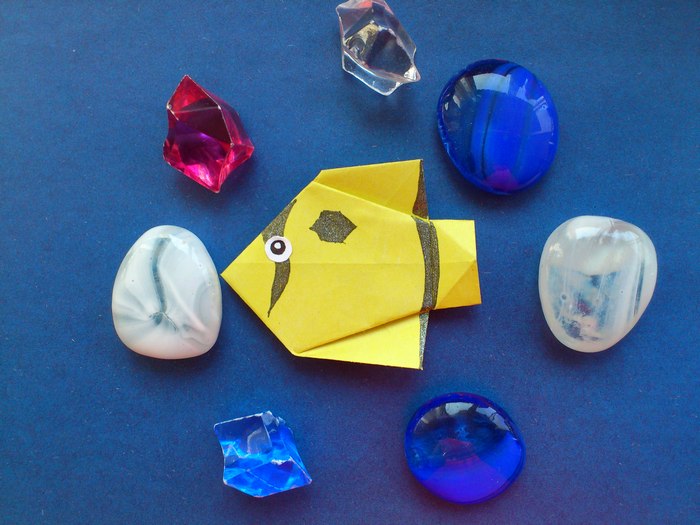
 Children are always interested in the brightest and simplest crafts, which are performed in 2 counts, but look complex and original. For example, origami fish is a bright homemade exhibit for children's crafts, it is performed quite simply, and also with the use of a minimum of materials. Sometimes the child asks to make some crafts, but for lack of time, inspiration is lost. In the case of such products, everything is quite different. It is only necessary to show a quick scheme of assembly, and a bright sea crafts will be ready.
Let's review and repeat the scheme of assembly of origami fish, make sure that the craft is really simple. To develop children's accuracy, diligence and practical skills of working with paper, be sure to train them on such models.
To make origami fish in the suggested format, prepare:
- a square of yellow paper;
- a black pen with glitter on it;
- the eye in any form.
[H3]How to assemble an origami fish[/H3]
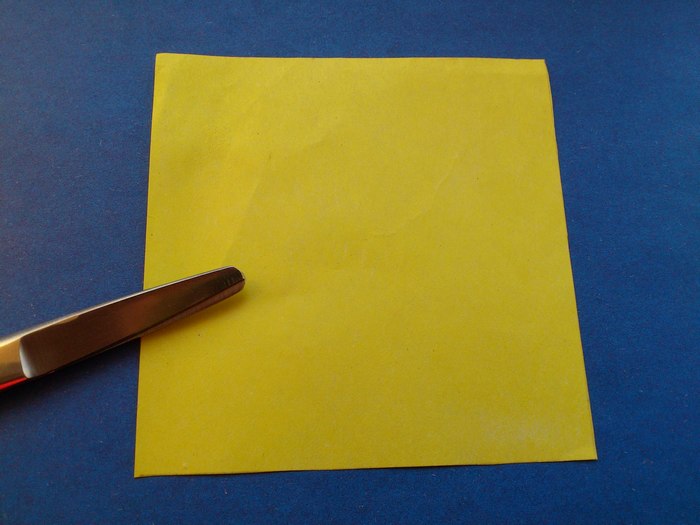
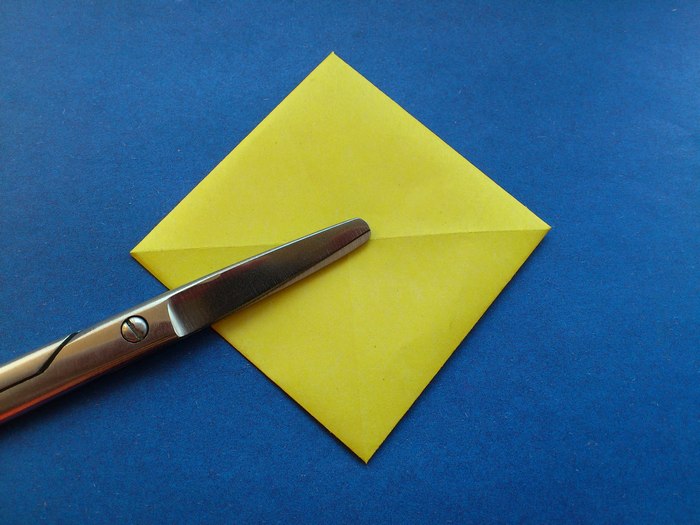
1. Prepare the yellow square. This is the initial part, which will soon turn into a fish figure in skillful hands.
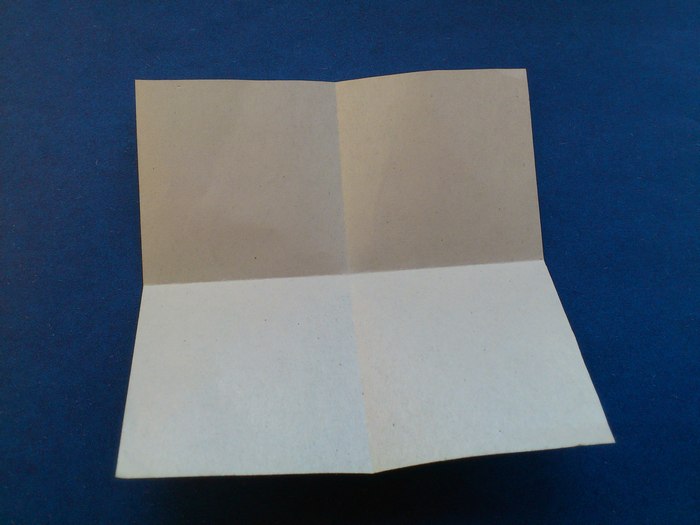
2. If you have single-sided paper available, you can turn it with the back white side facing you. Fold the sheet so that the 2 heights are marked crosswise. The highlighted strips will be the reference lines that you will need to use to guide the folding.
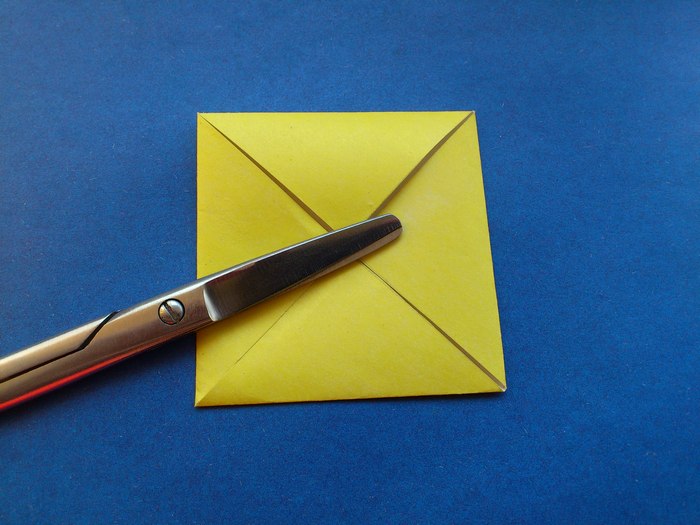
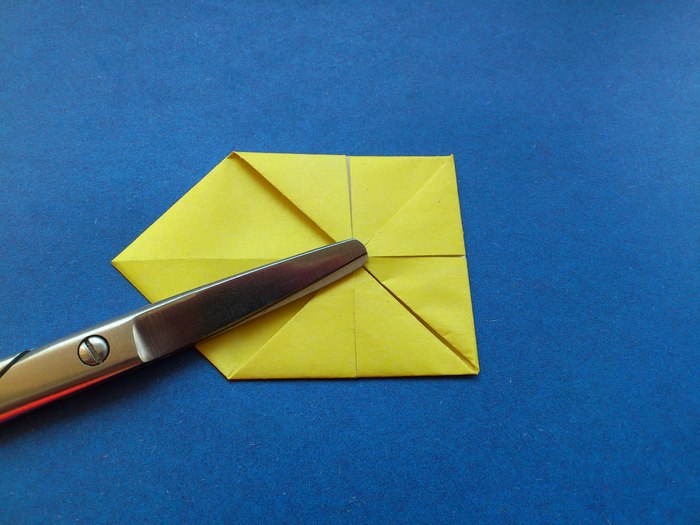
3. Fold all corners of the square to the center. Show the front yellow side of the paper. You should have a new square that is half the size. Also, this new square will be double-layered.
4. Turn the blank over with the back blind side facing you. All the folds must be perfectly smoothed so that the paper remembers this position and does not open. Turn the square so that two opposite corners are horizontal, the other pair is vertical.
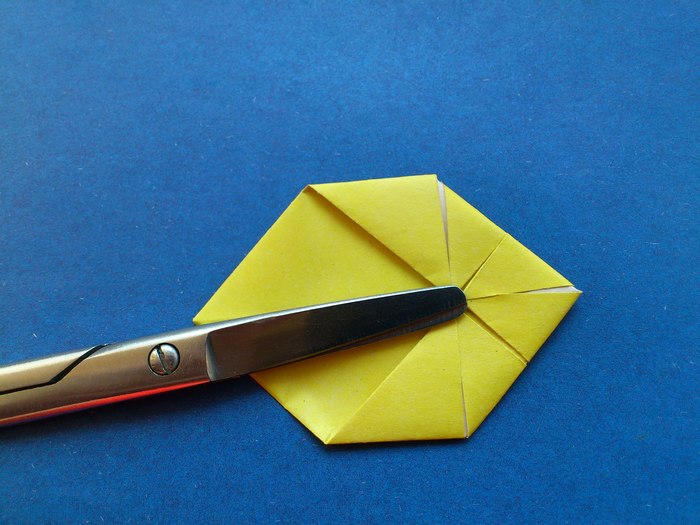
5. Fold the top and bottom corners as well as one of the side corners, e.g. the right one, to the center again. In this way, the model will become more complex. You will get a multi-layered piece, in shape resembling an open envelope. Leave one corner unfolded.
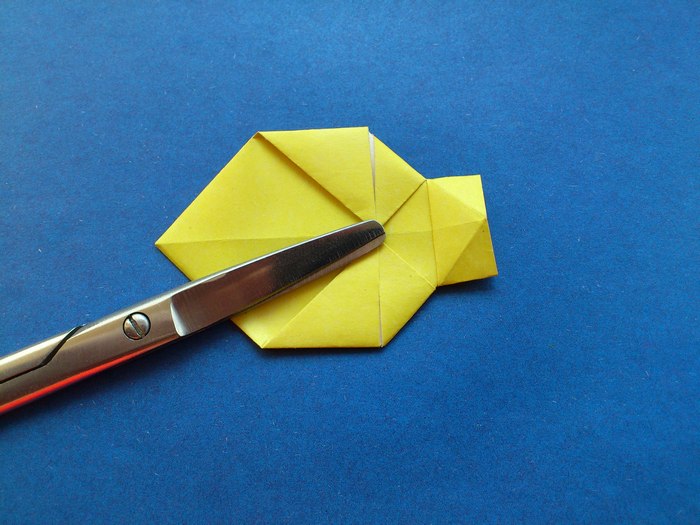
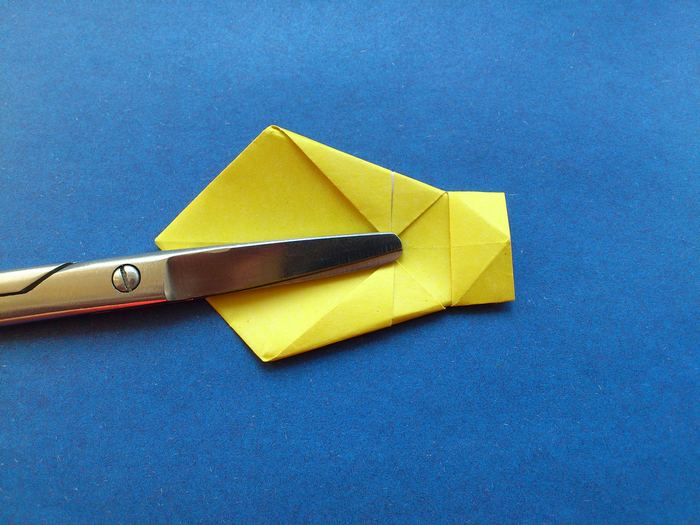
6. In the resulting envelope, fold 2 more straight corners, but in the opposite direction. Tuck in all the folds. Since the initial square has already been folded many times, the paper will tend to spread out.
7. Now, holding the whole structure in this position (you can press with your index finger at the center point), pull back the right small triangle. Smooth the paper in this place. Thus, in front of you will be not a triangle, but a rectangle, which will later become the tail of a small fish.
8. The top and bottom corners in the pattern that is now in front of you are no longer straight. Bring them back at an angle as well.
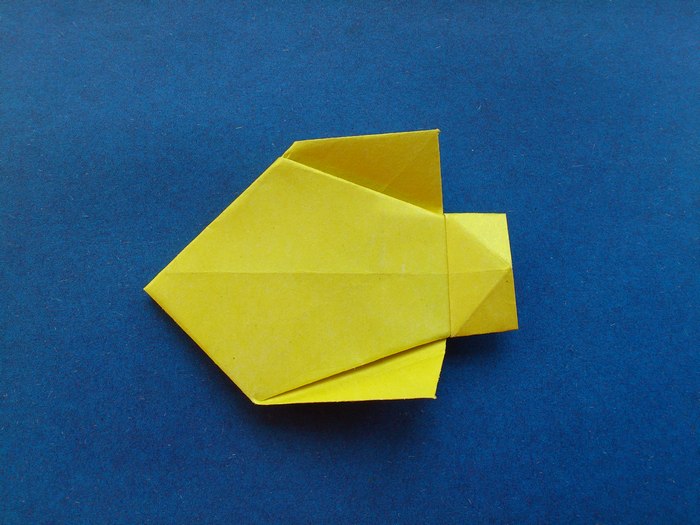
9. Turn the fish figure over with the blind side facing you. Lift up the top and bottom parts, showing the traditional fins.
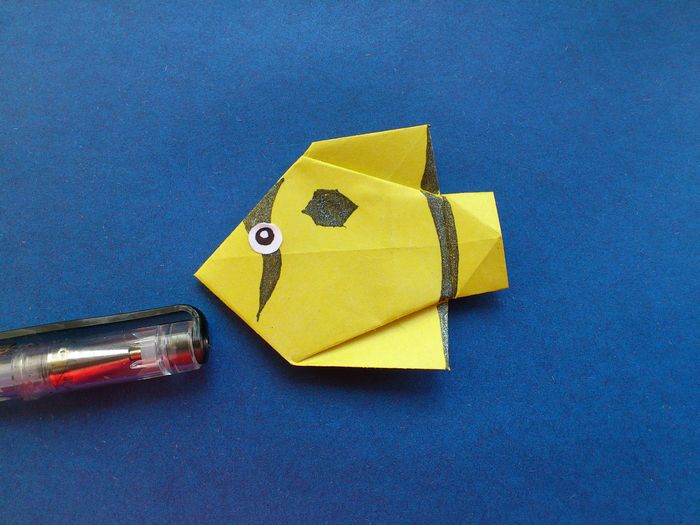
10. Origami fish figure is assembled, but you can still glue the eye, use a pen to draw stripes on the body and fins.


