
 Snowflakes can be cut out or modeled using colored or plain white paper. Many variants have already been invented. For example, the most common of them is cutting out different patterns from napkins, tracing paper, foil, candy wrappers. Fold the sheet several times, then make small cuts (simple triangular, rounded or intricate), unfold the paper and admire what you got.
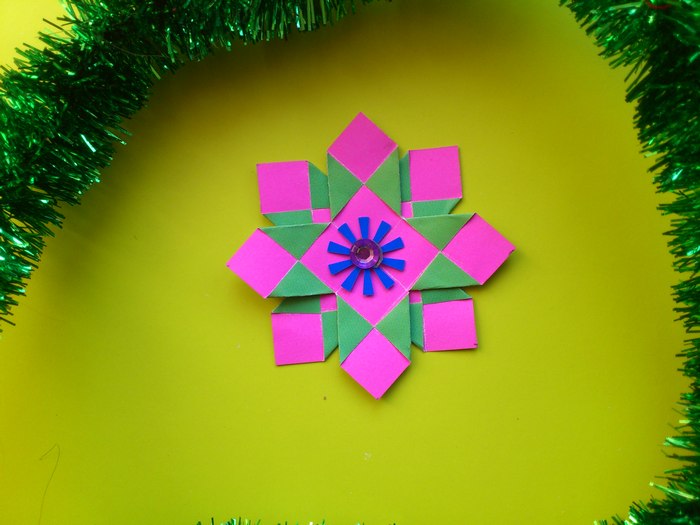
But there are ways to fold snowflakes in a different way. This tutorial shows how to make a snowflake out of squares. There is nothing complicated in the technique, you only need to cut each square in four places, then tuck the corners. What is the zest of such snowflakes? First, they are very quickly modeled, from a few leaves you will get a whole mountain of bright crafts, secondly, you can use unusual designer paper, which itself is very beautiful. For example, today you can find two-color paper on sale, on both sides it is different in color, and if you are lucky, then also in texture. Simple modules of such paper look complex, unusual. And if they are supplemented with sparkling details, the snowflake will play with new motifs.
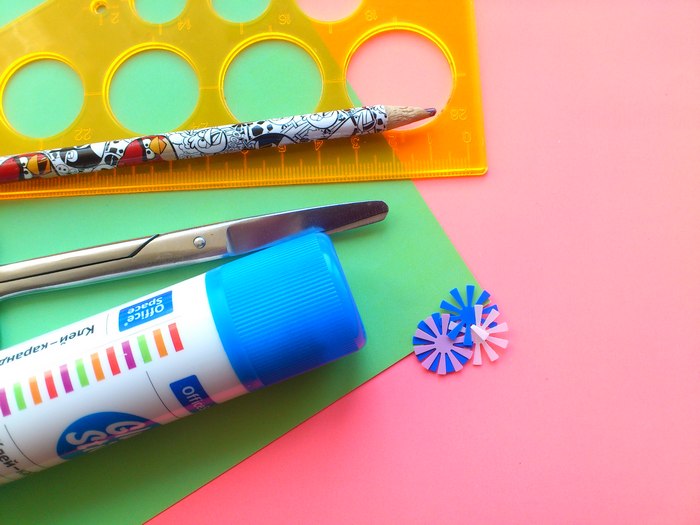
What is desirable to use to create beautiful snowflakes:
- squares of brightly colored two-color paper;
- decorative centerpieces, snowflakes or sequins;
- glue.
How to make a bright snowflake with your hands
1. If you do not have ready-made squares, you need to cut them out of the cloth. You will need 2 identical squares for one craft. Cut them out.
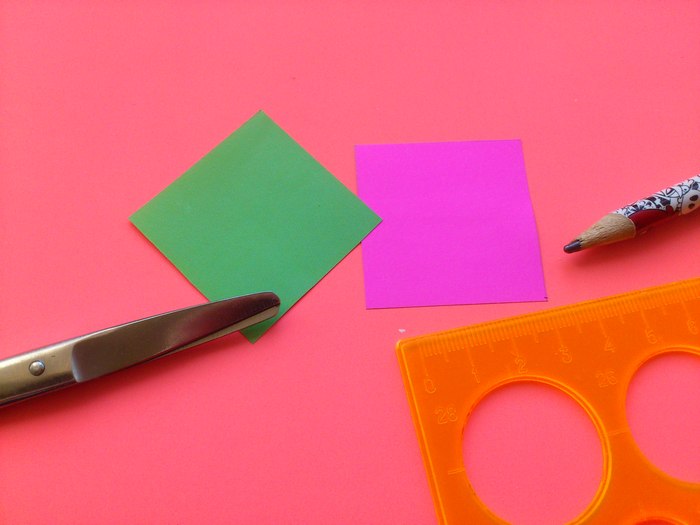
2. Choose the size of the squares as you wish.
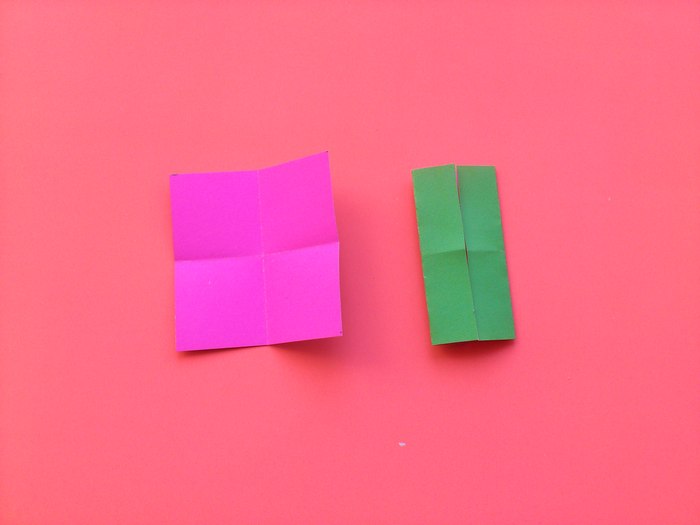
3. Next, fold each piece so that you can mark the future incision points. Divide each piece into 16 squares. To do this, first fold the squares by height. At this stage, 4 squares will stand out due to the cross-shaped line in the center. Next, unfold the paper and point the two opposite sides of the squares to the center.
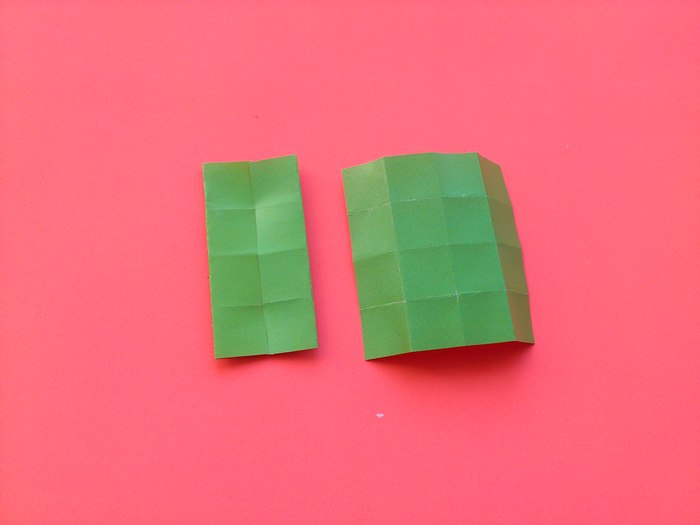
4. Next, unfold the paper again and fold to the center of the sides, but this time use the second pair of sides.
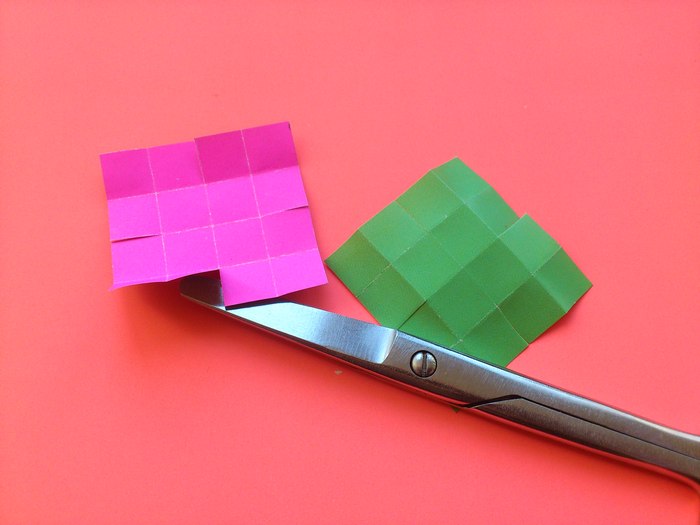
5. Now that you have 16 segments in each square, make the main cuts that will allow you to model the interesting modules for the snowflake. Cut one strip in the center of each side.
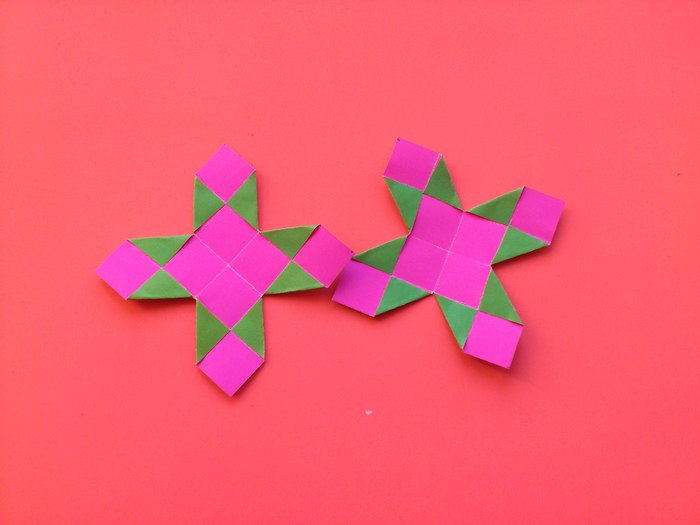
6. Turn the paper toward you in one or another color. Orienting on the cuts, make folds by turning the corners toward you. Glue all the corners in this position. Each snowflake module will have four rays.
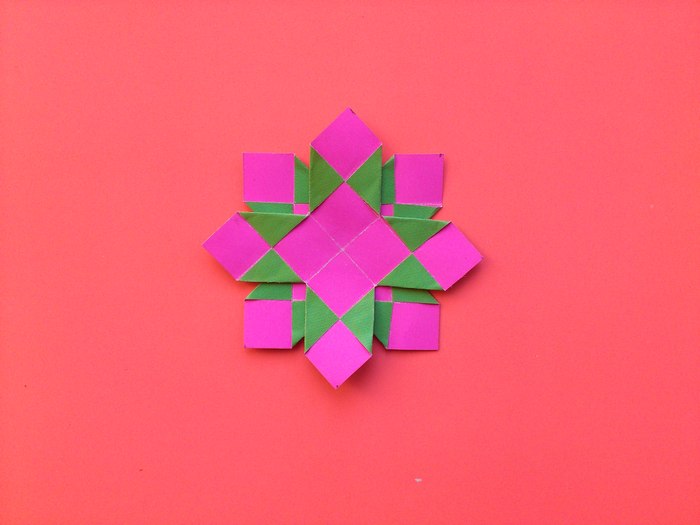
7. Glue the obtained parts as shown in the photo. You have an interesting Christmas, two-color model, which will be noticeable on the tree among other toys.
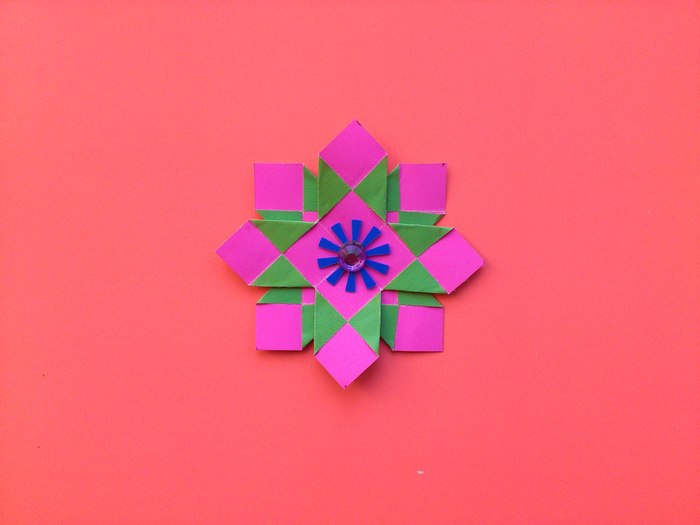
8. To decorate the craft even more, add a small middle - a snowflake with a bead in the center.
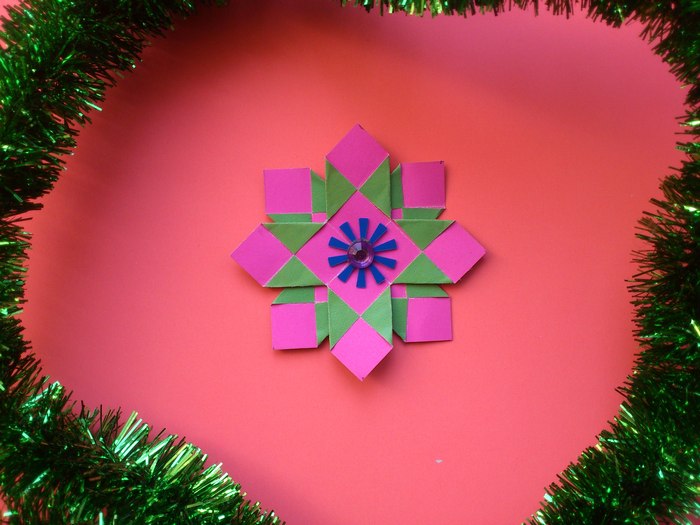
The interesting lesson is over. This kind of creativity opens unlimited possibilities for everyone who wants to make a lot of bright details for the celebration of the New Year. If you have time, materials and free hands, you can even make a real garland.


