
In the world of paper magic there are peaks, the conquest of which is akin to a feat. Among them is an origami dragon. It's not just a craft, but a challenge to your skills, patience and the embodiment of an ancient myth in a crisp piece of paper. For the fantasy fan, creating your own paper kite is a ritual, a meditation and a way to touch legend. 🧙♂️✨
Are you ready for a journey that will take a few hours, but will give you a figure worthy of adorning the throne of the Night King or the desktop of a modern programmer? Then take a deep breath, warm up your fingers and get ready for epic folding!
🏔️ Prologue: Why the dragon?
The dragon in origami is the apotheosis of art. It combines dozens of complex techniques: working with small details (claws, teeth, horns), creating volume from the plane and giving dynamics to static material. Models created by craftsmen like Kamiya Satoshi or Robert Lang are masterpieces of paper engineering. Your dragon will become not just a piece of jewelry, but a symbol of your perseverance and love for fantasy worlds.
Read also: Why does paper tear when folding origami?
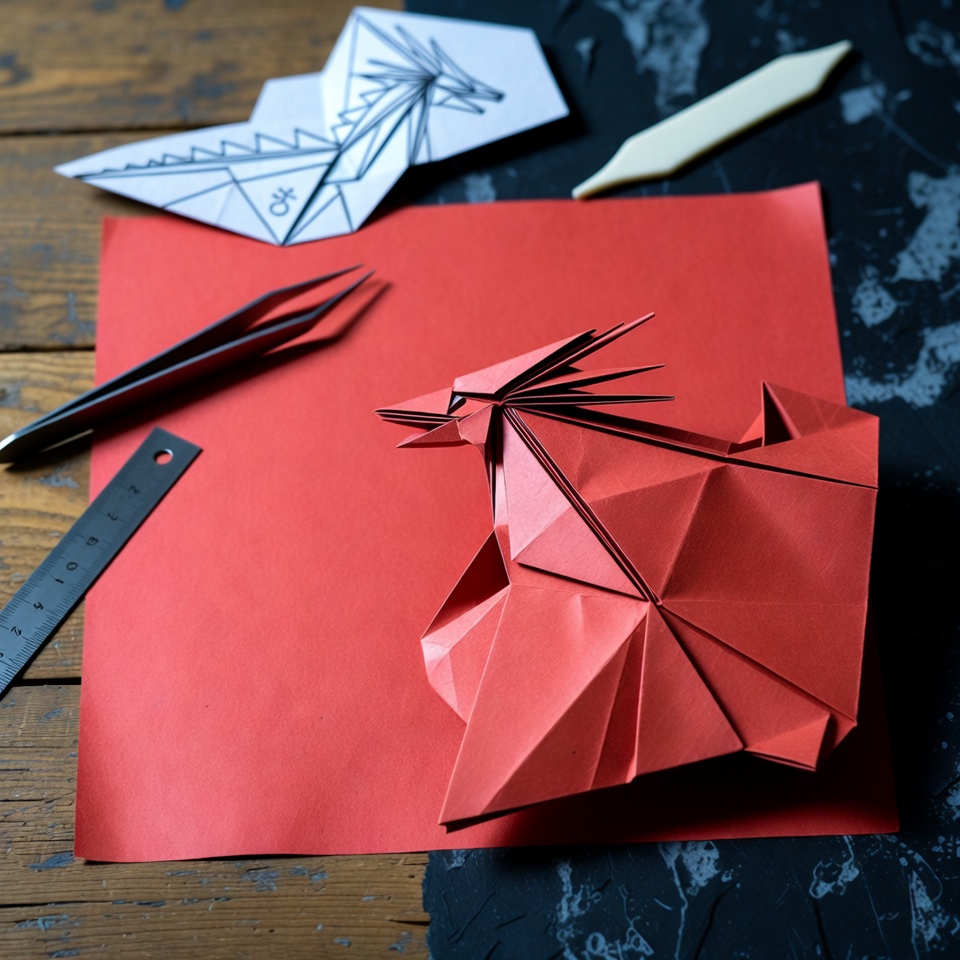
⚔️ Preparing for Battle: Choosing Your Equipment
This kind of paper battle requires the right equipment. The 50% of success depends on it.
1- Paper is your scales and wings.
- Ideal: Special paper for complex origami (Tant, Elephant Hide, Uni-color). It is strong, thin, holds difficult folds perfectly, and often has an interesting texture or metallized cast. 🏮
- Budget alternative: Office paper with a density of 80-100 g/m², colored on one side in the desired color (black, red, emerald, silver). A4 format, from which you will make a square.
- Size: Don't be too small! For your first attempt, take a square of at least 35x35 cm. It is incredibly difficult to fold small parts on a small sheet of paper.
2- Tools are your magical arsenal.
- Forceps (surgical or modeling): Indispensable for working with microscopic flaps and forming folds in hard-to-reach places.
- A blunt object for ironing out folds: A special bone, the back of a scissors blade, a plastic card. This is needed to create clear, "sharp" ribs.
- Perseverance and a good soundtrack: Prepare a playlist of Game of Thrones, Lord of the Rings or epic sympho-metal. It'll put you in the right mood. 🎵

📜 Master Class: Birth of a Kite (Key Stages)
We won't go through the whole scheme here (you'll need a separate book for that), but we'll walk through the key and most spectacular steps of creating a classic dragon model with wings. It is assumed that you are familiar with the basic shapes (Bird, Frog).
Step 1: Creating a Skeleton - Complex Base
Most dragons are formed from a so-called Bird Base with many additional layers and pockets. Your task at this stage is to create a blank with as many future rays as possible, which will become the tail, neck, wings and head.
- Tip: After each fold, iron it with a bone. Precision at the start is the key to success in the final.
Step 2: Modeling the Head and Mouth
This is the most fiddly part. One of the narrow rays of the base turns into a head. The reverse bending technique is used to form the muzzle. Then the mouth is created using the opening bend technique. Here you will need tweezers to gently pull and flatten the paper inside, creating volume for the jaw.
- Lifehack: To make teeth, you can make microscopic incisions at the tip of the mouth and bend the triangles away. 👁️
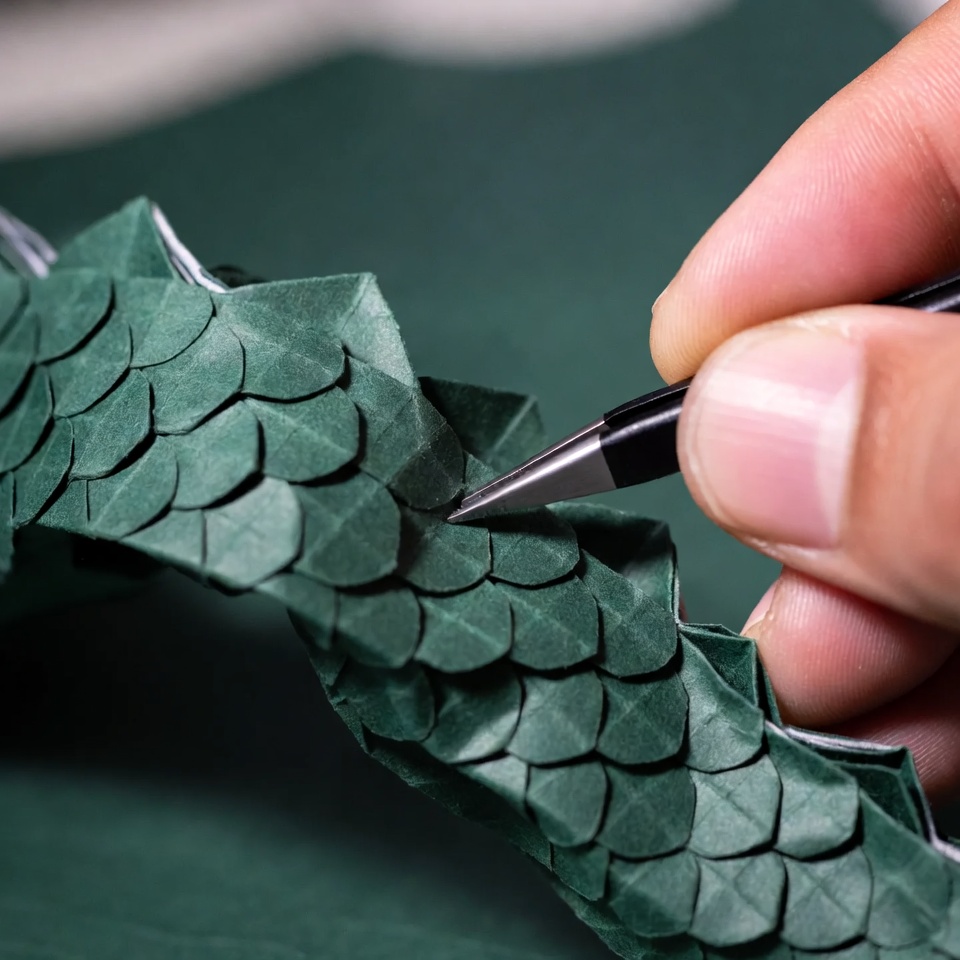
Step 3: Working out the Wings and Scales
The wings are created by opening and flattening the large planes of the blank. To make them look leathery rather than flat, use the wet folding technique. Lightly (!) wet the paper with a spray can to make it pliable and give the wings a curved, natural shape. Allow to dry.
The scales on the back and tail are created by a succession of fold-harmonica or reverse folds. It is monotonous but meditative work.
Step 4: Tail, Claws, and Final touches.
The tail is tapered by successive internal folds. A tassel can be left at the tip by making incisions. Paws and claws are formed from the remaining "rays" by narrowing and reverse folds. The final and most important step is to give the pose. The dragon should not be flat. Curve the neck, unfold the wings, put the paws in a dynamic pose. Bring it to life!
Read also: Snowflake in modular origami technique
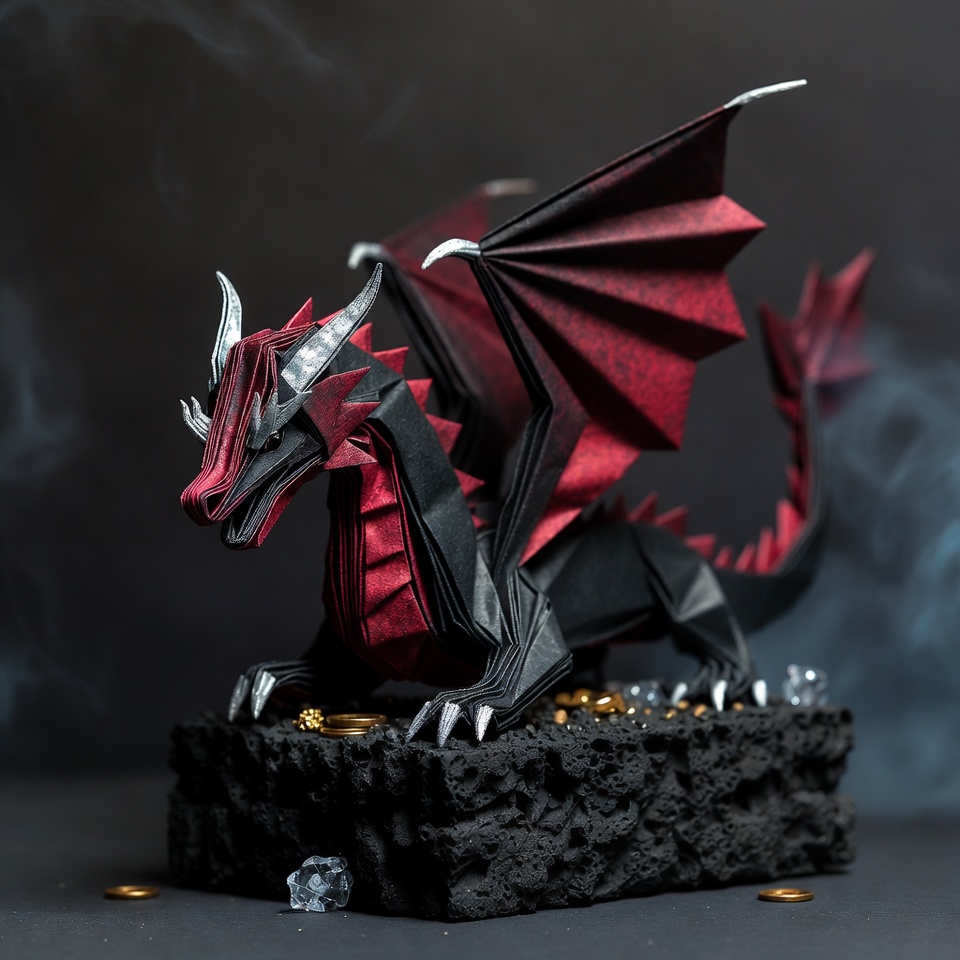
🎨 Reviving a legend: Decor and ideas for the fantasy fan
Your dragon is folded. Now make it yours!
- A play of color: Use gradient paper - from black body to red wing tips. Or choose an icy blue and white option.
- Paint effects: With a dry brush and metallic effect acrylic paint (gold, silver, bronze), go over the scales, horns and claws. This will add incredible volume and realism. 🖌️
- Base and Entourage: Place the dragon on a jelly crystal, a piece of bark, or a homemade rock made of Styrofoam and papier-mâché. You can place a tiny origami treasure or a knight figure nearby.
- Interior Solution: Create a shadowy installation. Place the dragon in a deep frame and shine a spotlight on it to create a menacing and beautiful silhouette on the wall.
⚡ Epilogue: What do you get in the end?
You don't just get a figurine. You're getting
- An artifact created by your hands, with a unique history and energy.
- The highest degree of respect from anyone who understands the hard work behind the addition.
- A trophy that symbolizes the triumph over complexity.
- The perfect item for cosplay, board games, or the most atmospheric gift for the same fan.
Folding a dragon is the way of the samurai in the world of origami. It requires calm, concentration and respect for the process. But the moment you place the finished serpent on the shelf and it stares back at you with a commanding gaze through the ages, you realize: it was worth it. You didn't just fold the paper. You summoned the dragon. 🐲✨
May your dragon guard your dreams and inspire new accomplishments!


