
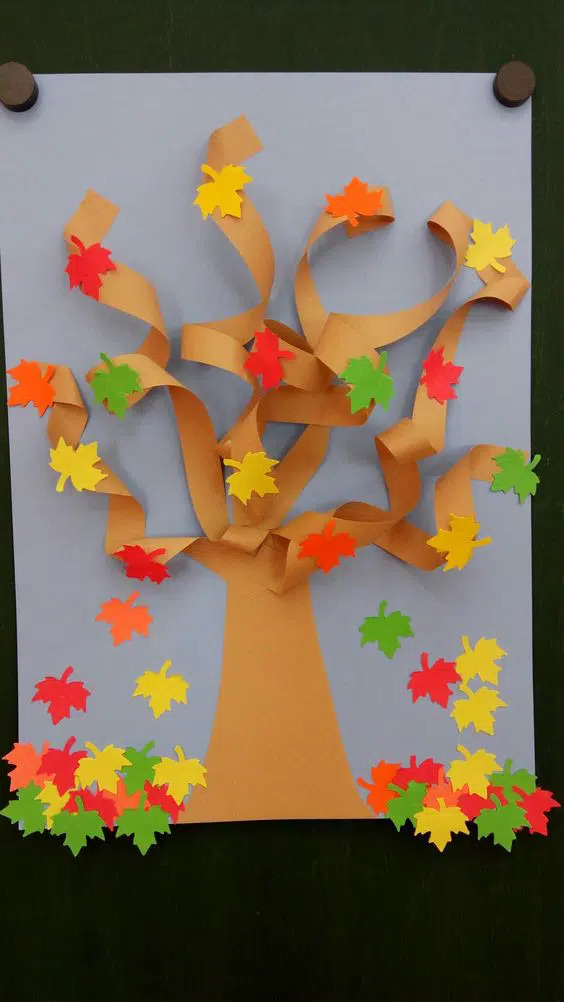
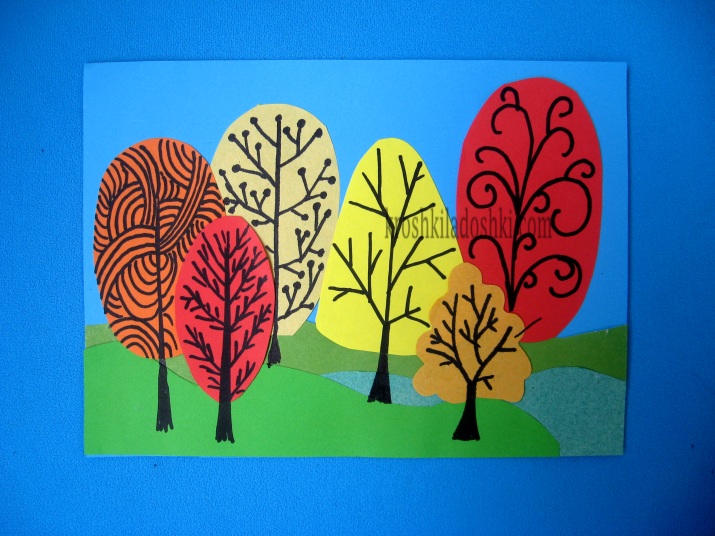
Spring is the time when nature comes alive, filled with light and bright colors. It is at this time that you especially want to create something beautiful with your own hands. Today I will tell you how to make a surprisingly simple, but at the same time effective volumetric applique "Spring Forest" from colored paper. This project is suitable for absolutely everyone - both kids, schoolchildren and adults who like to craft for the soul.
The craft will be not just flat, as usual applications, but with a beautiful volume: the trees will seem to go beyond the paper, and colorful flowers scattered across the meadow. The best part is that you need the most basic materials available in every home!
What you'll need:

- Colored paper of different shades (green for tree crowns, brown for trunks, blue for sky, yellow, pink, white for flowers)
- White A4 cardboard (base)
- Scissors with sharp tips
- Glue stick or PVA
- A simple pencil
- Ruler
- Black felt-tip pen
- A little patience and a good attitude!
Step-by-step instructions
Step 1: Prepare the background
Take a sheet of heavy white cardboard. This will be our canvas. If you want to add dynamics, you can slightly shade it: I took a dry brush, slightly diluted blue watercolor with water and made soft cloudy streaks. This technique immediately sets the lightness of the whole composition.
Step 2: Making tree trunks
Cut out tree trunks from brown paper. It is very important that they should be of different heights and thicknesses: tall, thin, shorter, thicker. Nature does not like perfect copies, and every tree in the forest is unique.
Tip: the edges of the trunks can be "ripped" a little with scissors or carefully cut in strips to imitate bark.
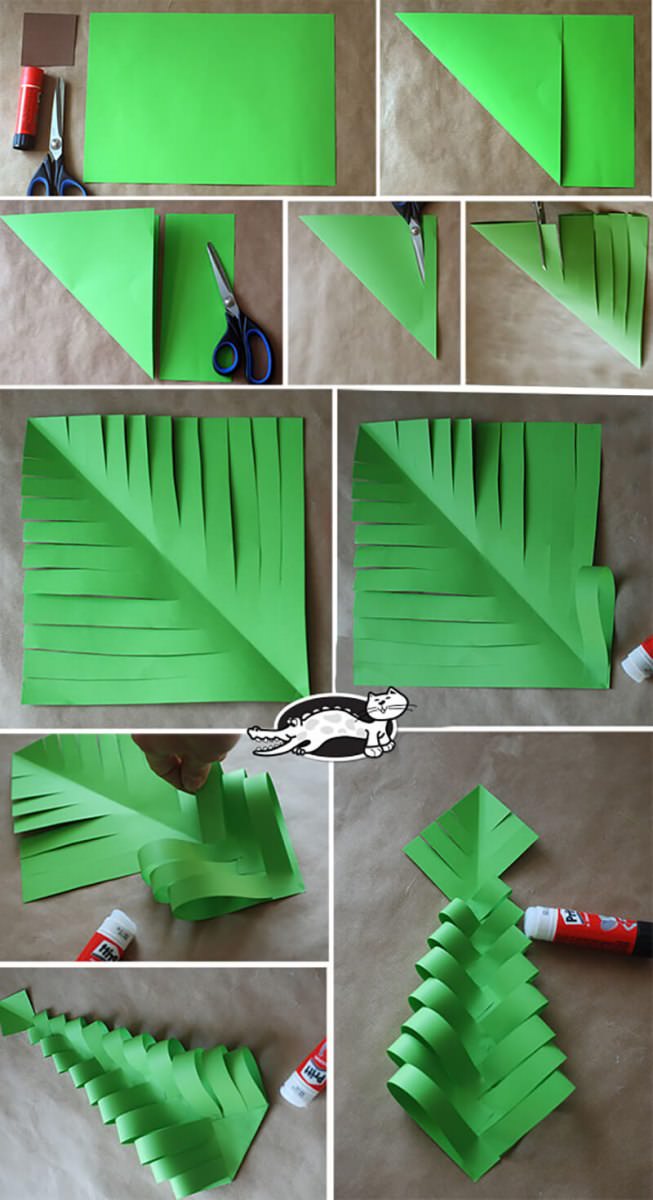
Step 3: Cut and assemble the crowns
Now for the most magical part - the crowns. Cut out oval and cloud shapes from green paper. I made at least two or three different crowns per tree to make the forest look dense. Use 2-3 shades of green, it will create volume: lettuce, grass, emerald.
Trick: each crown slightly bend in half, without ironing the fold - then it will "stick out" beautifully on the applique.
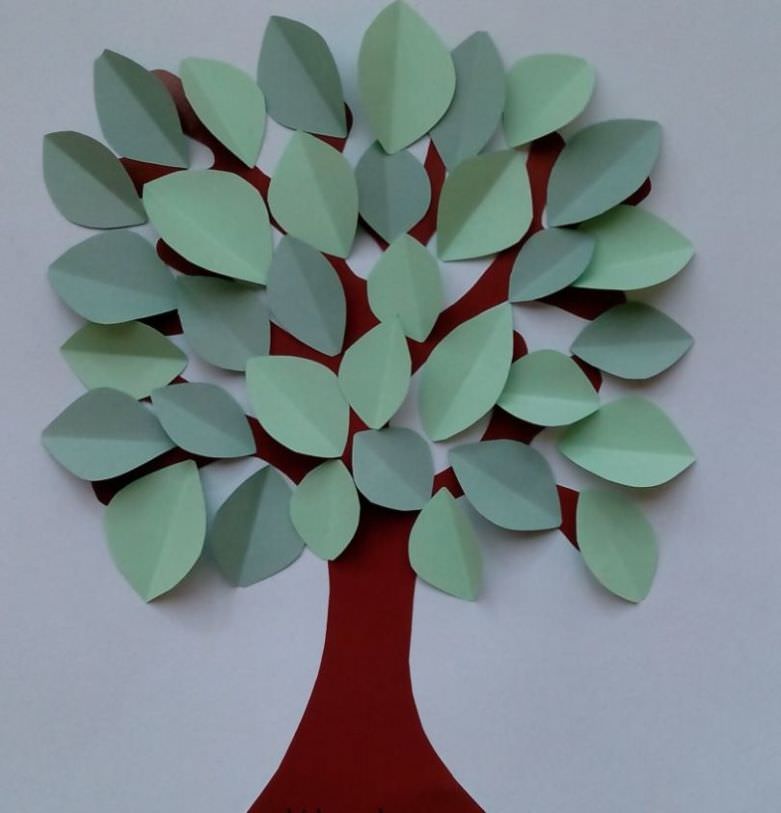
Step 4: Glue the trees together
Glue the crown onto the trunk so that the middle is glued tightly and the edges are left free. The smaller the gluing area, the more voluminous it will be. I even made double crowns in some places - one a little higher, the other overlapping - to add density.
Step 5: Decorate the glade with grass and flowers
Move on to the lower part of the composition. Cut thin strips of bright green paper and cut them into teeth to imitate grass. The strips can be glued overlapping, in layers, alternating colors - light green, dark green.
Don't forget the flowers! Cut out tiny flowers of different shapes from yellow, white, and pink paper: daisies, bells, and forget-me-nots. The more variations, the more fun the glade will be.
I scattered the flowers chaotically, but you can make little "islands" - like mini lawns growing here.
Step 6: Add details
Now we take a black felt-tip pen. Draw thin branches on the trunks. Somewhere you can add a hollow tree. In the sky - a few soaring birds. The main thing is to draw easily, without excessive accuracy. Nature is alive!
I also used a thin brush to make a couple of highlights on the leaves - I used white gouache. This little trick makes the applique look even brighter and more spring-like.
Step 7: Finalize the composition

Check all the elements: lift the crowns, spread the flowers, glue the grass where necessary. As a result, you will have a real miniature forest in front of you - bright, lively, with a volumetric texture.
If desired, you can insert the craft into a simple frame without glass - then the volume will remain, and the work will look like a real painting!
Lifehacks for brightness and volume:
- Use as many shades of the same color as possible. Even three tones of green will give a sense of richness of detail.
- Make the crowns uneven - nature doesn't like symmetry.
- Easy curves on paper work wonders: the forest looks as if alive, even if the craft is flat.
- Try not to overload the application from the bottom, otherwise the forest will "fall" down. More light at the top!
My feelings about the job
This applique is a real therapy. While you are cutting out trees and leaves, you feel like a part of the spring forest. It is important to take your time and enjoy the process. I did this work together with my niece, and even she, despite being five years old, managed to create her own little fairy tale.
So grab your paper - and go get inspired!


Very interesting and useful idea for creativity with children! Volumetric applique "Spring Forest" not only develops fine motor skills, but also teaches to notice the beauty of nature.