
Rabbits are a symbol of tenderness, kindness and home comfort. Making crafts in the form of this cute animal is a great way to spend time with children, develop their creativity and decorate the interior. In this master class we will go through in detail how to make a rabbit from simple materials that can be found in every home.
This craft is suitable for kindergarten, school or family crafts. It does not require complicated tools and expensive materials, and the result will please both children and adults.
Materials and tools
To make the rabbit you will need:
- White paper or cardboard (crafts base)
- Colored paper (pink, black for eyes and nose)
- Scissors (safe for children)
- Glue stick or PVA
- Crayons or markers
- Additional embellishments (ribbons, beads, glitter - optional)
If you don't have colored paper on hand, you can use white paper and color it, or take old magazines and cut out the desired shades.
Step-by-step instructions
Step 1: Preparing the parts
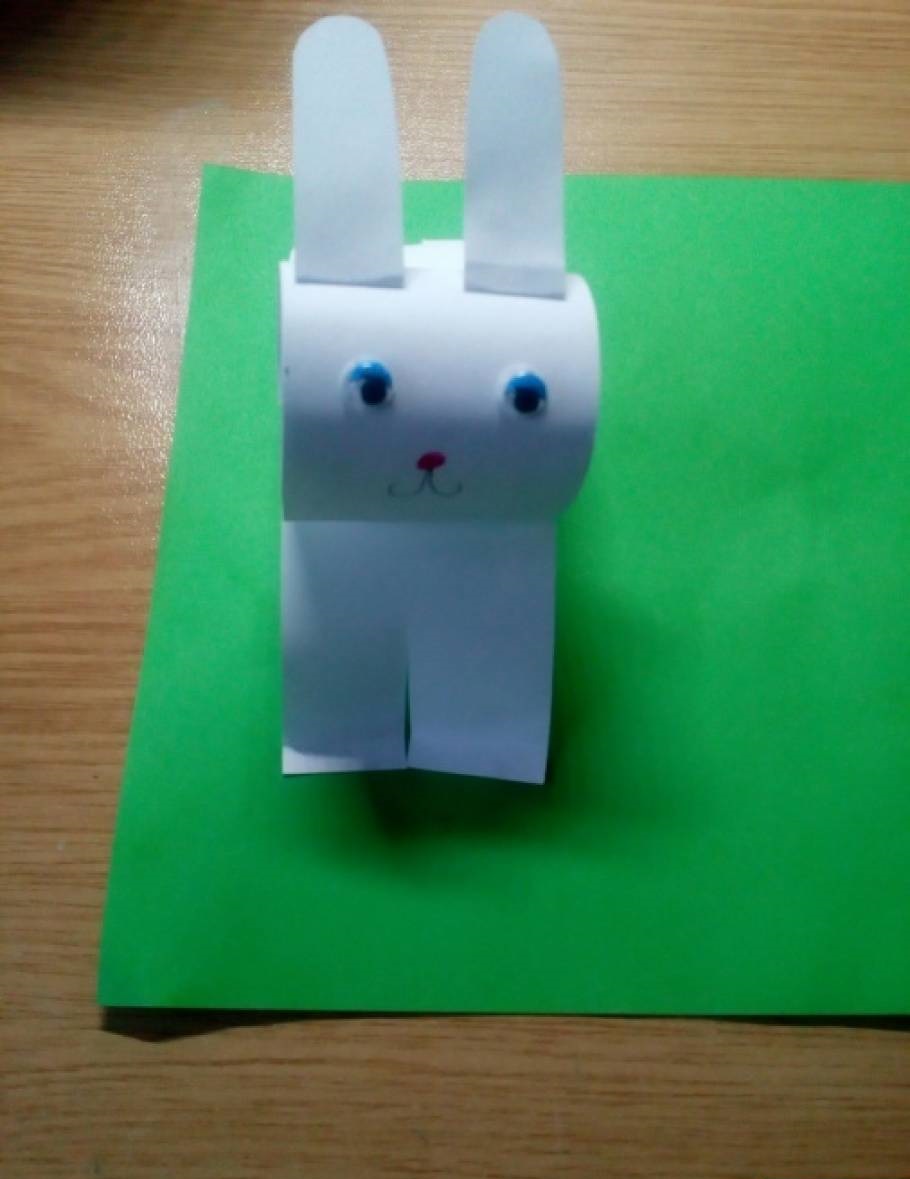
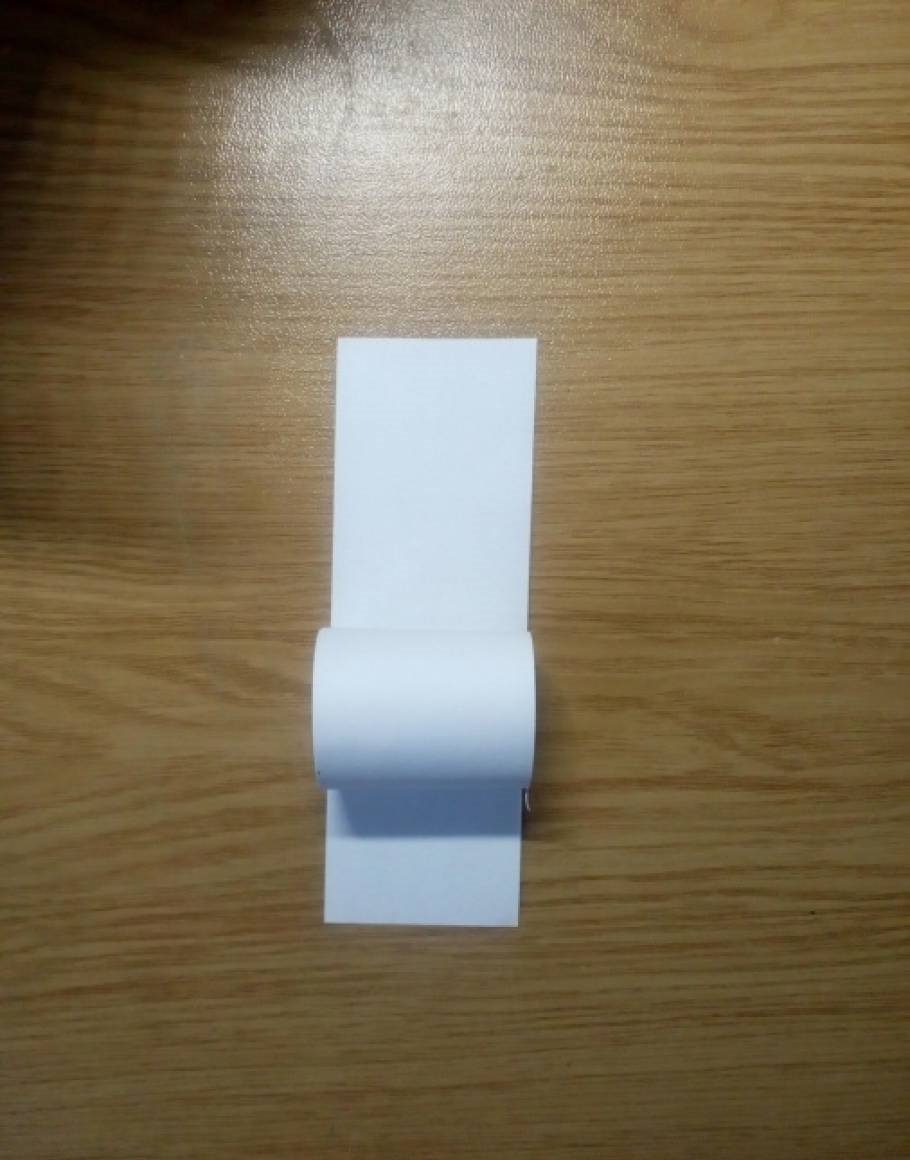
- Torso and head
-
Cut out two ovals from white paper: one larger (torso) and one smaller (head).
-
If you want a three-dimensional craft, make two identical ovals for the torso and glue them together, leaving room for filler (absorbent cotton or napkins).
-
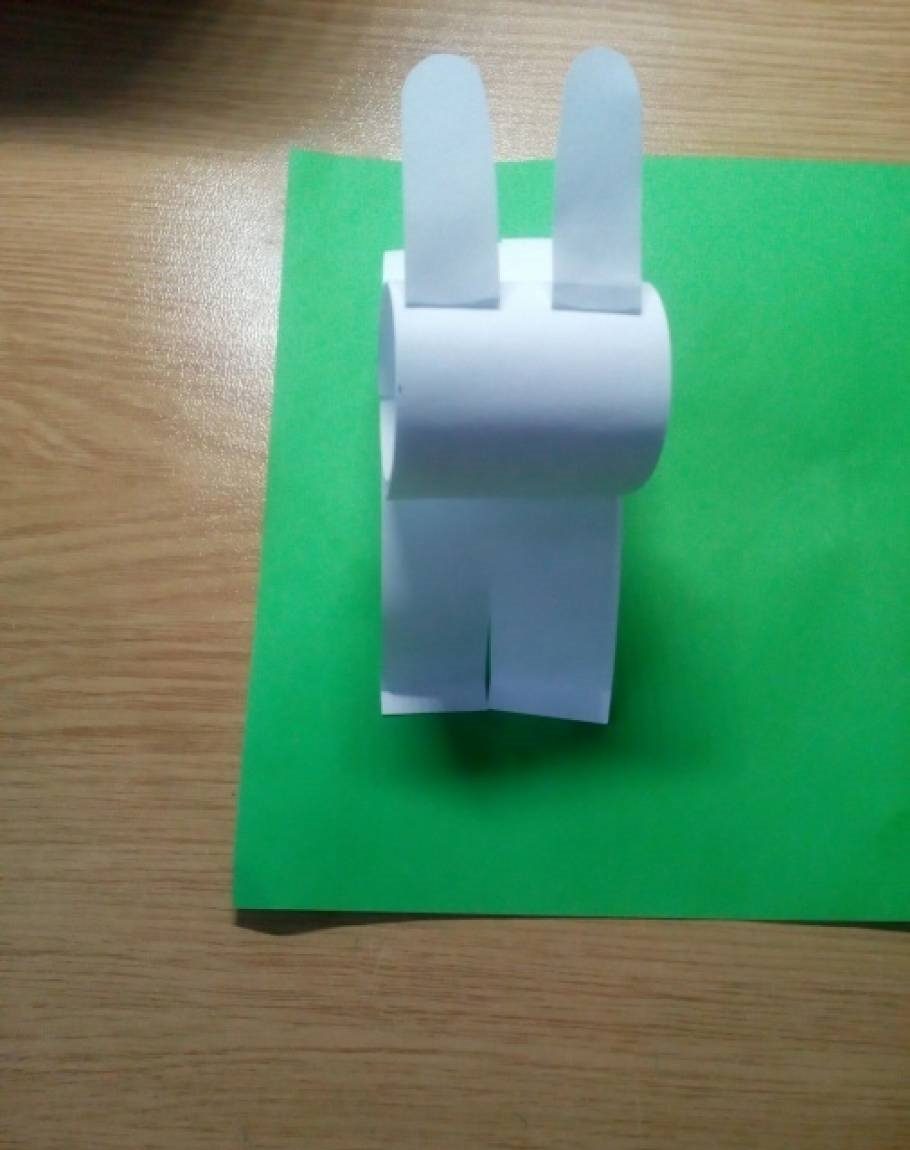
- Ears
- Cut out two long ears from white paper.
- From pink paper, make the inside of the ears - two smaller elements.
- Glue the pink parts inside the white ears.
3. Muzzle
-
-
Eyes: two small circles of black paper or drawn with a felt-tip pen.
-
Nose: a small pink triangle or circle.
-
Whiskers: you can draw or glue thin strips of paper.
-
Step 2: Assembling the rabbit
- Glue the head to the torso.
- Add ears - they can be attached to the back of the head or between two layers of paper if you are making a three-dimensional craft.
- Decorate the face: glue eyes, nose, draw a smile.
Step 3: Decor (optional)
- Bow - cut out colored paper and glue it around the rabbit's neck.
- Flowers or hearts - decorate the torso with small appliqués.
- Volumetric elements - If you used absorbent cotton for the filling, you can add a fluffy tail.
Craft options
-
Origami rabbit
-
If you want to make a craft without glue, you can fold a rabbit from paper in the technique of origami.
-
-
-
Make a rabbit out of a money bill.
-
-
A rabbit made of felt
-
If you have pieces of felt, you can sew a soft toy using the same pattern.
-
The benefits of creativity for children
Creating a craft like this develops:
- Fine motor skills (cutting, gluing)
- Creative thinking (choice of colors, decorations)
- Perseverance and concentration
- Aesthetic perception
Conclusion
Such a rabbit can be used as:
- A gift (to family or friends)
- Decorating a child's room
- An element of holiday décor
The main thing is to show your imagination and enjoy creating! Try different variants, experiment with materials, and you will get unique crafts.
Have fun creating! 🐰✨


