
 Money origami is a hobby for some, for others just an interesting kind of creativity, a way to create unusual gifts, as well as an occasion to try something new. Models can be different, but it should be taken into account that any bill is a rectangle in shape. And such schemes (using exactly a rectangle) there are far fewer than those, the basis of which is a square. Nevertheless, even such schemes can be used. And it is not necessary to cut the bill, after all, it is money, crafts in the future can be turned around and use the material used for its manufacture for its intended purpose.
This tutorial shows you how to assemble an origami rocket from a money bill. This is another easy craft that will not require many folding steps.
To build a rocket you will need:
- one bill of any denomination;
- a file or a thin stick.
[H3]Manigami rocket step-by-step:[/H3]
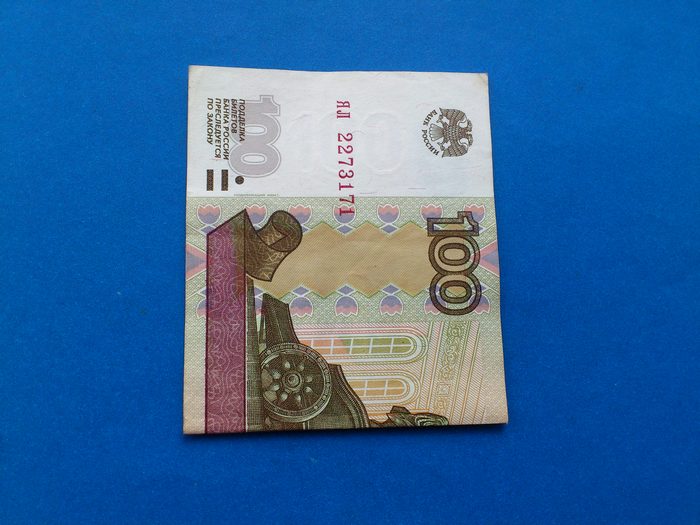
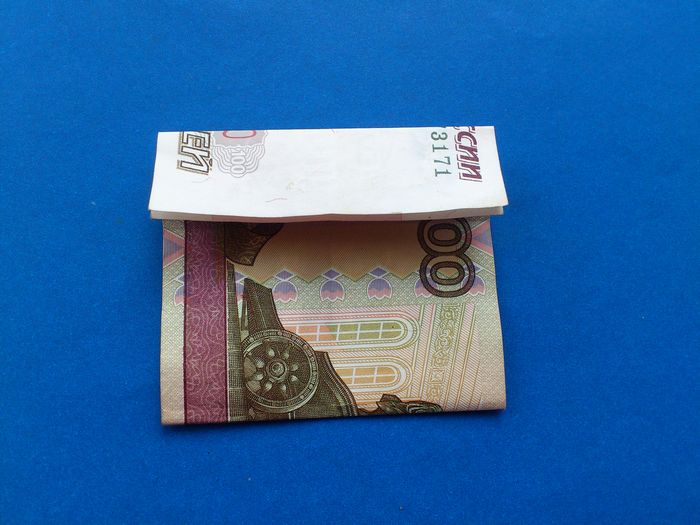
1. To create a rocket according to a similar scheme, you need a square sheet of paper. There is no point in cutting the bill, it is enough just to fold it in half. Further all actions are made on the folded sheet.
2. In the resulting square pattern, first mark one height by clearly folding the quadrilateral in half and sewing the fold.
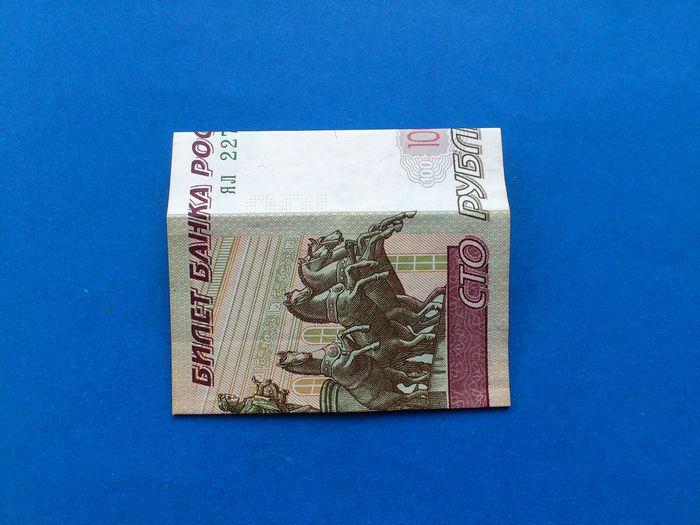
3. Then highlight the second height by curving in a perpendicular position.
4. Unfold the piece again, but the bill should always remain folded in half. Now point one side of the square to the height parallel to it. Fold and press to highlight this segment.
5. Turn the resulting model with the folded segment away from you. Several folding steps are now behind you. Now the hardest part is left.
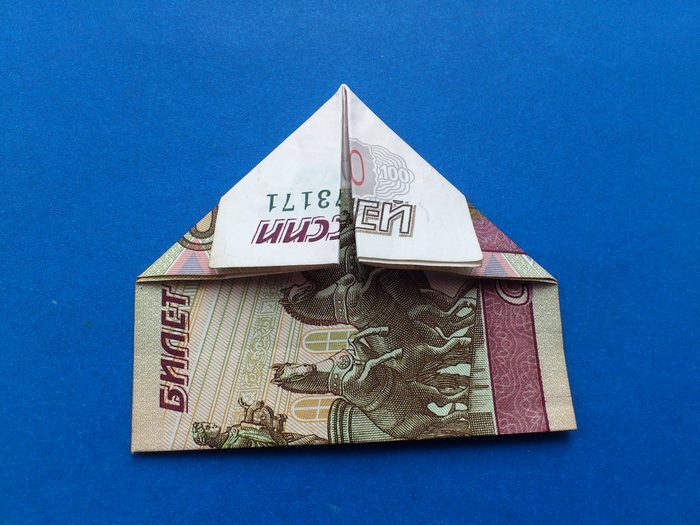
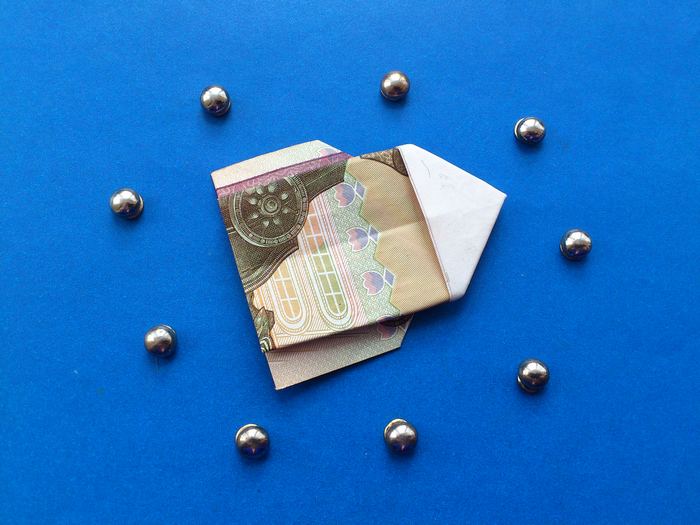
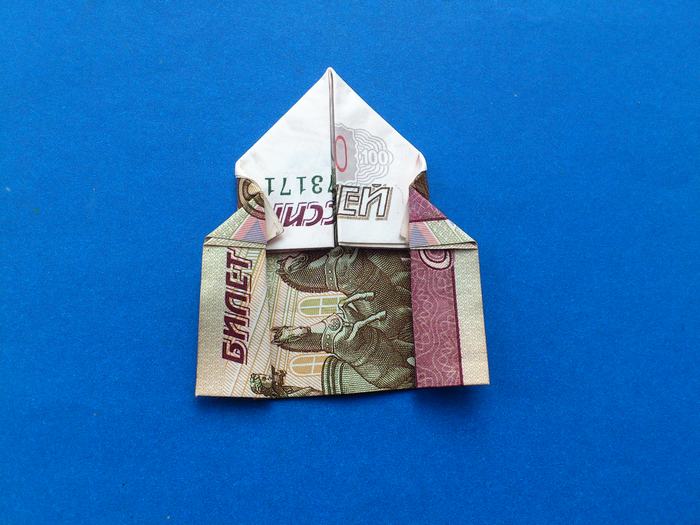
6. In the resulting quadrilateral, bend the top corners (where there is a bent segment). You should get a part resembling a tent. Thus, the folded paper will appear on the back side. At the top you will get a corner of the house.
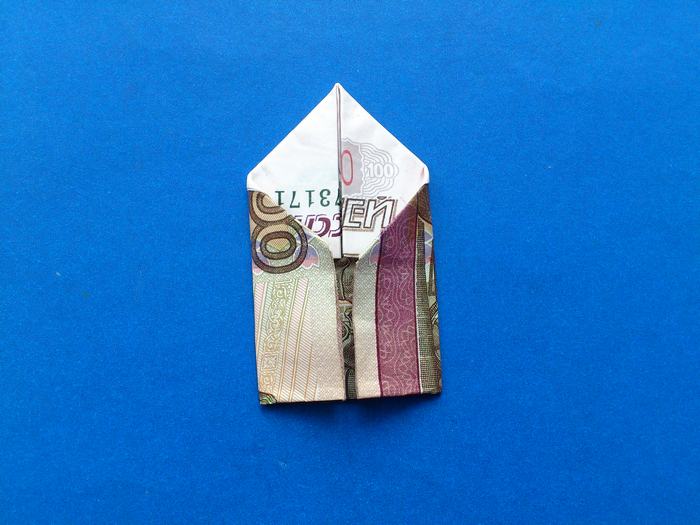
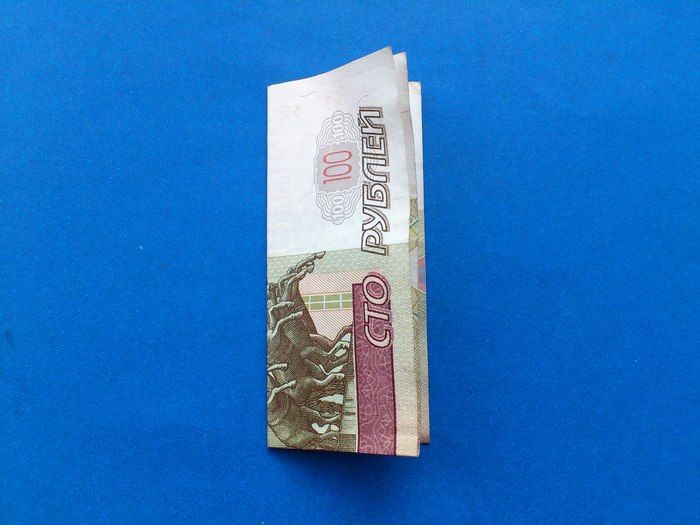
7. Fold the two sides vertically and parallel to each other. Be sure to join them along the center line. At the top of the planned folds, the paper will be folded many times, so it will resist, straighten it with a file or a stick.
8. Now bring the opposite tails outward by making vertical folds on the same sides. But do it in a different place, so that only small parts of the tails go outside. Also in this case it will be difficult to fix the paper in this position. Use the file again to level it in the corners. When folding the model, put a hard object through and stretch the paper gently so that the folds are even and hold well.
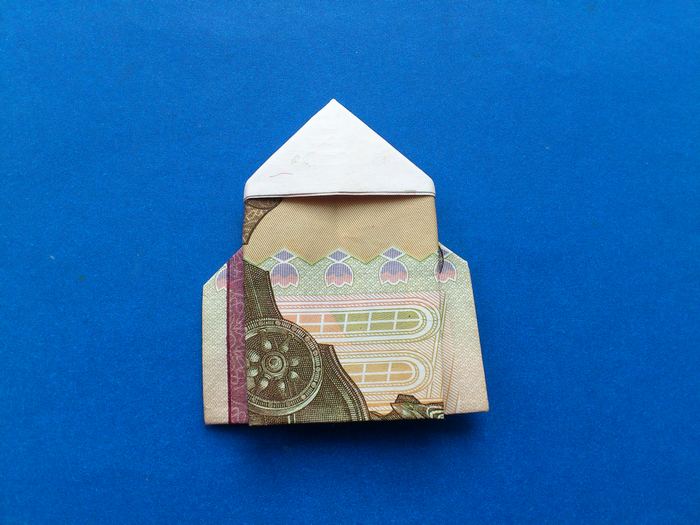
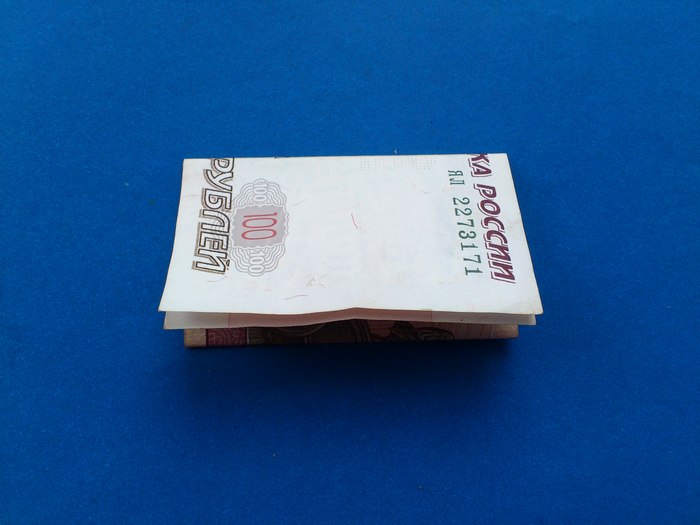
9. Turn the resulting model with the other side facing you. Now you have an origami rocket in front of you, which is ready to fly.
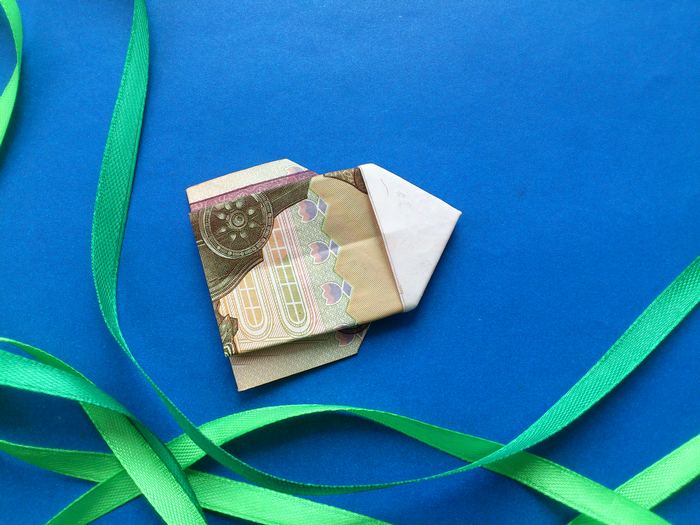
Here is such an interesting scheme of assembling origami from a money bill turned out. The main thing is that it is light. Nevertheless, it is always better to practice before work, so as not to make unnecessary folds and not to spoil the appearance of the material.


