
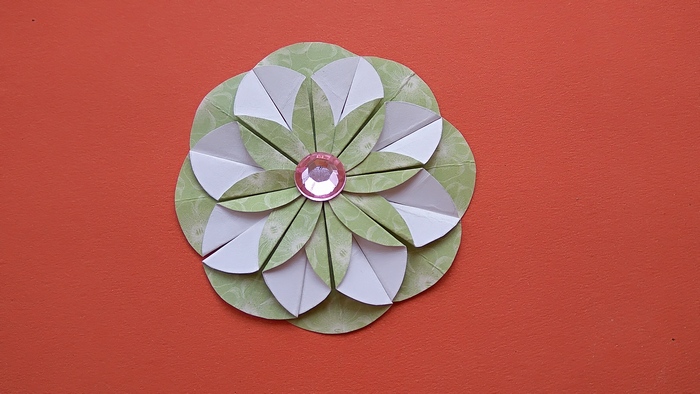
 Such a flower looks elegant and festive. Such a craft wins due to several important factors. For example, the flower is made of separate paper modules - parts folded in a special way. Thanks to this, an unusual visual effect is achieved (two-color version), as well as a volumetric composition. Also for modeling used a unique colored designer paper and 1 delicate stone on an adhesive base. Although such paper and costs much more expensive than ordinary sets of colored sheets, it looks much more advantageous in crafts. Usually on sale come sets of sheets with ornaments, from them you can choose the option that you like or fit the color. To make one flower, one sheet is enough, although you may need a fairly large product to decorate a large box or for another purpose, then the situation will change.
To make a smart greeting flower from modules, prepare:
- a piece of designer paper;
- and a scissors;
- glue;
- 1 pebble of pink or other color on a sticky base;
- cardboard.
[H3]How to make a flower from modules[/H3]
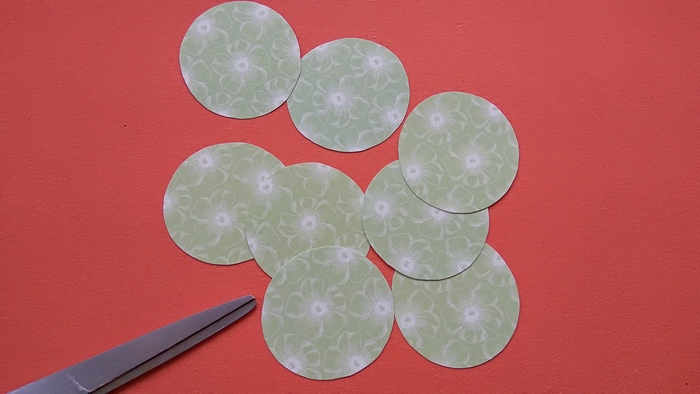
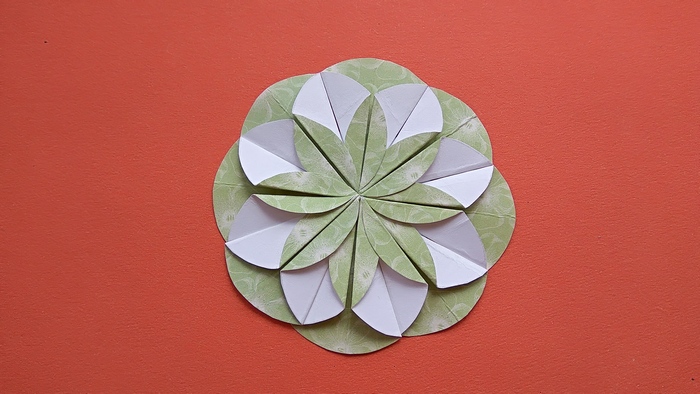
1. Modules should be made of circles. Then all the obtained parts should be placed evenly on the cardboard circle, gluing them overlapping. The ideal number for even distribution around the circle without gaps is 8 pieces. Using a circular, cut out 8 identical circles. Or make a cardboard template first, and then trace it 8 times on paper, cut it out. The template itself will be used for the bottom base.
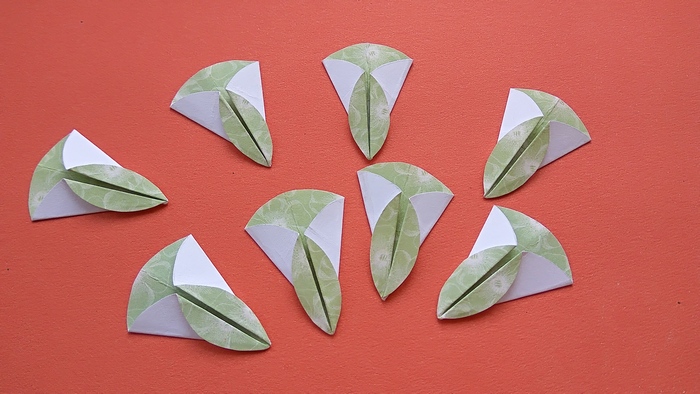
2. Fold all 8 pieces in the same way as shown in photo 2. To get an interesting module, first make a cross-shaped core by folding. Fold the circles in half, then fold again perpendicular to the first fold. Orienting yourself on the 4 highlighted points (the extreme points of the cruciform bend), fold the 2 adjacent segments. You can turn the paper with the colored or white side facing you. Then turn the paper over and fold the folded sides in the center again. You will get a two-color module. If the paper does not hold its shape well, it can be carefully glued.

3. So, you should have 8 modules of the shape you see in front of you in photo 3 if you are reading this article. They are all the same and perfect for creating a beautiful flower.
4. Make an additional cardboard circle as a base by dabbing it with glue. Start attaching the modules. Glue the first one with the pointed end in the center.
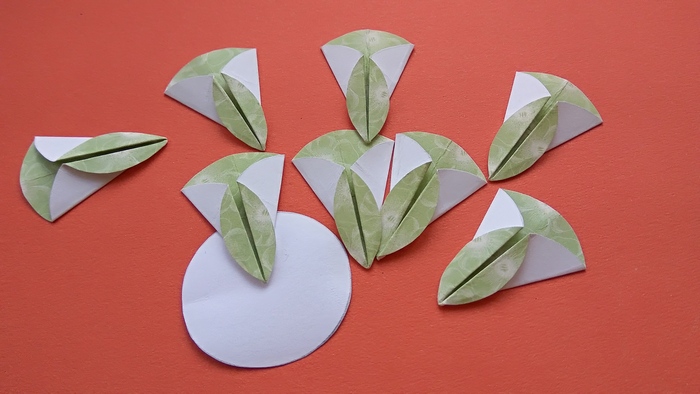
5. Next, glue the second piece by carefully inserting the paper piece into the gap between the top tab. Then attach the third, fourth and so on parts-petals in the same way. Assemble a smart flower. Smooth it out. It turned out to be an interesting design. You can look at the craft for a long time to understand what way it is actually made.
6. At the very end, glue a stone in the center for additional embellishment.


