
Such crafts are loved by both adults and children. First of all, it is beautiful. Secondly, you do not need anything complicated - paper, glue, scissors and a little patience. Thirdly, paper mushroom is a universal thing. Suitable for interior decoration, and for classes in the garden, and as part of the fall composition. The handicraft is not dusty in the corner - it is pleasant to look at. Now I will tell you how to make it step by step. 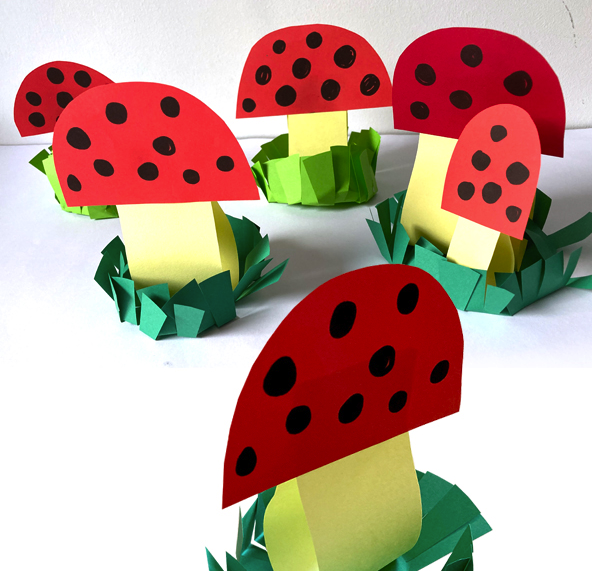
What you'll need
The list is short and quite accessible:
- red or brown paper (for the hat);
- white paper (foot and spots);
- some cardboard (for stability);
- glue - PVA is better, but you can also use glue stick;
- scissors;
- a simple pencil;
- ruler (optional);
- Circle or round object for tracing.
Step 1: making the hat 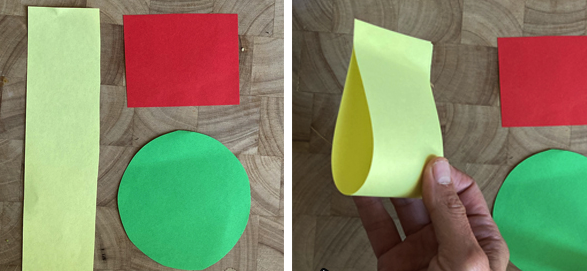
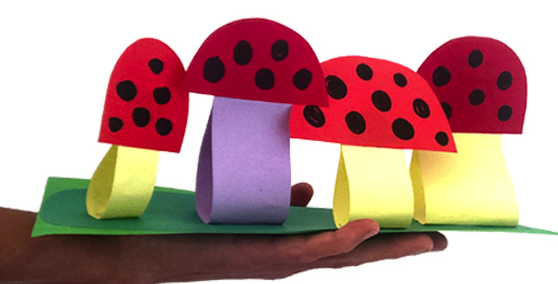
Take a sheet of red paper and draw a circle. The diameter is 12-15 cm, depending on the desired size of the fungus. Cut it out. Next, cut the circle exactly in half. We need one half.
Fold it into a funnel - fold the edges together to form a cone. The more we bend it, the higher the cap will be. Fix it with glue. Don't worry if a little sticking out - we'll trim it later.
Step 2: decorate the hat 
Cut out circles from white paper - these will be the spots like fly agaric. The size is arbitrary. Some people like large ones, some like small ones. Glue them on the top of the cap scattered. You can slightly go over the sides.
If you want to make an edible mushroom (e.g. a boletus), just use brown paper without stains. The result is more modest, but realistic in its own way.
Read also: How to make brightly colored flowers from paper
Step 3: mushroom stalk 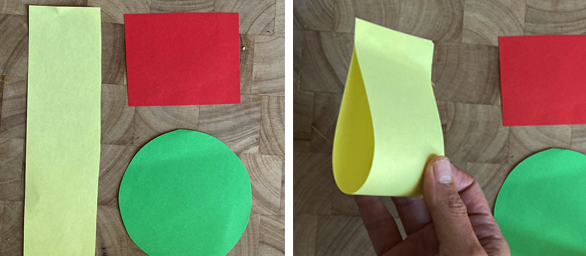
For the foot, take a rectangle of white paper - about 10 cm high and 6-8 cm wide. Roll into a cylinder and glue along the seam. It is better to use thick paper to make the construction hold. If the leg is unstable, you can insert a tube, toothpick or fold a piece of cardboard inside.
Now glue the cap on top. To keep it straight, you can slightly cut the top of the stem crosswise and insert a cone inside. Fix it with glue.
Step 4: stand 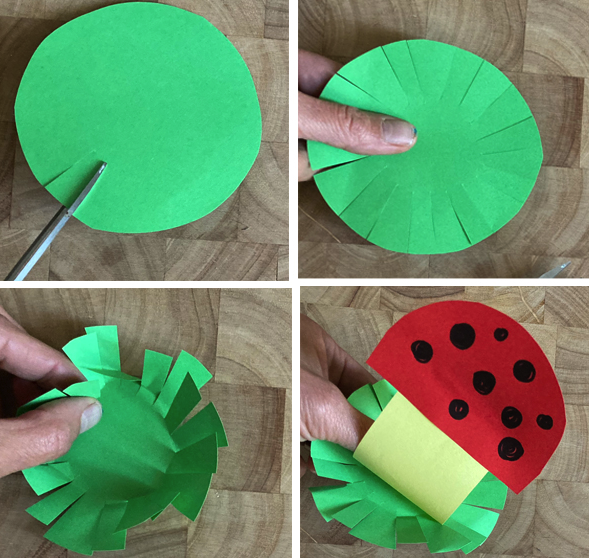
The mushroom isn't standing very steady? Then you need a base. Cut out a circle or square from cardboard and glue the foot to it. You can decorate this base as a "forest floor": glue green strips (grass), pieces of paper (fallen leaves), add another small mushroom or a paper snail.
If you make a composition, then on such a base you can glue several mushrooms of different sizes at once.
Step 5: what's next
The mushroom is ready. You can leave it as it is, or you can add to it. For example, you can add a smiling face - you will get a "cartoon mushroom". Or glue on the eyes, as they do in children's crafts. You can make several mushrooms - and get a forest glade.
These crafts are often made in kindergartens and schools during the fall season. They can be used as props for productions, classroom decorations or simply as decorations. They are durable, do not wrinkle, and are easy to store.
Conclusion
Paper mushroom is simple, quick and interesting. The main thing - no special materials are required, and the result is bright and memorable. Such a handicraft is easily adapted to the age and level of the child. And adults can also enjoy it - especially if you want to do something with your hands after a day of work.


