Introduction to portrait painting for children
Drawing portraits is a fascinating form of creativity that develops children:
✔ Observation and attention to detail
✔ Spatial thinking
✔ Sense of proportion
✔ Artistic taste
✔ Emotional intelligence
This workshop is designed specifically to teach children ages 6-12 the basics of portrait drawing. We will cover simple techniques that will allow young artists to create recognizable images of people.
Preparing for the session: what you will need
For the first lesson, prepare:
-
Soft pencils (HB, 2B)
-
Eraser-claw
-
Heavy paper A4 or scrapbook
-
A simple stencil facial shape
-
Mirror (for self-portraits)
-
Examples of children's portraits
-
Multimedia presentation (optional)
Tip: For preschoolers, it is better to use wax crayons or felt-tip pens.
Basic principles of children's portraiture
-
Simplified anatomy - learning to see basic shapes
-
Game approach - making learning fun
-
Graduality - simple to complex
-
Positive attitude - focus on successes rather than mistakes
Step-by-step teaching methodology
Step 1: Fundamentals of Composition
Let's start by explaining the basic proportions:
-
Drawing the oval - the base of the face
-
Split it horizontally in half - the eye line.
-
Between the eye line and the chin mark:
-
Nose line (in the middle)
-
Mouth line (1/3 from nose to chin)
-
-
Face width ≈ 5 eyes
-
The ears are located between the eyebrows and the nose
Exercise: Invite your child to measure these proportions on your face with their fingers.
Step 2: Draw individual features
Eyes:
-
Drawing an almond shape
-
Add the pupil and iris
-
Don't forget the highlights and lashes
Nose:
-
Draw a triangle
-
Draw the nostrils
-
Adding light shadows
Lips:
-
Upper lip - two waves
-
The lower lip is a smooth arch
-
Between them is the bow line
Exercise-Game: "Assemble a face" - draw different versions of eyes, noses and lips on separate cards, then combine them.
Step 3: Hair and individual characteristics
-
Determining the hairline
-
Drawing the overall mass of the hairstyle
-
Adding characteristic details:
-
Bangs
-
Bundles
-
Curls
-
-
Emphasizing Distinctive Features:
-
Freckles
-
Glasses
-
Dimples
-
Tip: Use pictures of family members - it will be more interesting for the child.
Typical errors and their solutions
-
Eyes too big - proportion
-
Improper ear placement - using the hint diagram
-
Flat face - add some light shading
-
Identical faces - look out for unique features
Age specifics of learning
Ages 5-7:
-
Simplified schemes
-
Emphasis on recognizability
-
More game elements
Ages 8-10:
-
More precise proportions
-
The basics of light and shade
-
Working with emotions
Ages 11-13:
-
Anatomical features
-
Different angles
-
Stylization and experimentation
10 creative exercises
-
"Picasso Portrait of Mom."
-
"Self-portrait with emotion."
-
"Vegetable Man" (metaphorical portrait).
-
"Portrait by description."
-
"Drawing in the dark" (developing a sense of shape)
-
"A Portrait of the Future Self."
-
"Ridiculous proportions" (intentional misrepresentation).
-
"Portrait from memory."
-
"Making a face out of geometric shapes."
-
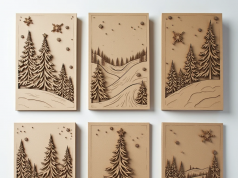
"Grattage Portrait."
How to motivate a child
-
Organize a home exhibition
-
Create a progress album
-
Draw together
-
Use different materials
-
Praise for effort, not just results
Additional resources
Recommended for training:
-
Apps: "How to Draw Faces", "Portrait Drawing"
-
YouTube channels: Drawing Together, Art for Kids Hub
-
Books: "Drawing a Portrait for Children", "Anatomy for Artists"
Conclusion
Learning portrait painting is a fun process that develops not only artistic skills but also the child's emotional intelligence. Start with simple exercises, gradually increasing the complexity of the tasks. Remember - the main thing is not a perfect result, but the joy of creativity and the development of observation.
Pro Tip: Start a "Progress Diary" where you keep all of your child's work - after a few months, you'll see a noticeable increase in skill!
Create with gusto! 🎨✏️


