It is not difficult to make a unique work of art at home with a minimum amount of expenses. White flowers from paper, even if they are not alive, will look fresh and tender both on the picture and on the card. Only your flight of fancy can limit the options of compositions and their diversity.
Materials and Tools:
- printer paper;
- creative paper (leftover wallpaper);
- thin cardboard or album paper;
- regular scissors and manicure scissors;
- colored marker;
- PVA glue.
1. To make a white magnolia flower, fold a small piece of white paper in half 2 times. In this case you will get 4 identical petals at once.
2. Cut out rounded petals like a white magnolia. See photo.
3. Make a small cut at the intended place where the petal will be attached to the base. Lightly dab glue on one of the cut pieces. Glue the two pieces together so that the petal has volume.
4. To make a lotus flower, fold a small piece of white paper in half 3 times. In this case, you will get 8 identical petals at once. Cut out more oblong and slightly pointed petals. For the lotus flower, you will need a few more petals: 1.5 and 2 times smaller.
5. It is not recommended to form the flower on the picture or card at once. A circle of a suitable size of white paper can be used to form a separate flower.
Glue your petals onto the bases so that they form flowers. When dry, cut off the protruding edges of the base.
6. Now we move on to forming the flower cores. Cut out rectangles of paper of the required size. Make many cuts on one side to make a fringe. Slightly squeeze the fringe between your thumb and scissors, pull the scissors through it. Then, twist the fringe into tubes with outward curls (a beautiful flower core will also turn out if you twist the fringe with inward curls). Now glue the hearts inside the flowers. If you wish, you can color the core or leave it completely white.
7. Next, you will need a base for the final composition. It can be a postcard, a painting or a 2-in-1 (one-sided postcard). For a double-sided postcard, take a thin cardboard or album paper of rectangular shape, as well as paper for creativity (wallpaper, randomly piled up in the house) of the same size.
8. On the paper for creativity (wallpaper) mark the middle, and on one of the halves cut out a rectangle (square) to make a frame for the future composition. Glue the frame to the base of the card.
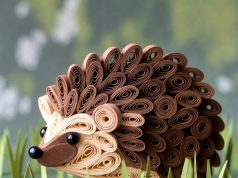
9. Move on to the actual formation of the composition. Place the flowers approximately where they should be. Glue the parts last, when the whole composition is ready! If you think the flowers look lonely without leaves, add them. Also, quilling skills will not be superfluous here. Twists will add mischief and sophistication to the overall picture, and will also help to create a similar branch for the flower. Is the image complete? Then you can glue.


