
 Do you want to invite someone to a wedding, congratulate or say nice words? Then make a card with your own hands. In stores, most often there are standard postcards - the usual flat ones, with typographically printed drawings. With your own hands you can create unusual three-dimensional products, using various accessories.
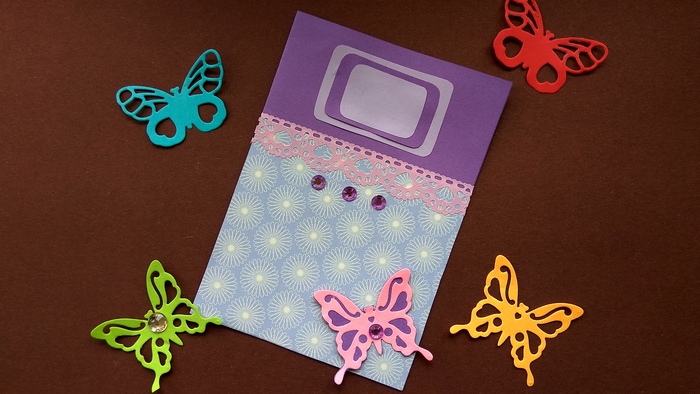
We offer you to study the variant of modeling a greeting card, which can be repeated by anyone. Beautiful lilac color, elegant rhinestones, fluttering butterflies, unique decorative tape - all this is collected in one product. Nevertheless, the card does not seem overloaded, it looks cute and elegant at the same time. Visually the craft is divided into two zones: the lower part is a decorative half filled with beautiful designer cardboard, rhinestones and butterfly, the upper part is functional - it is a small frame in which you need to write the name of the person to whom the card is intended. Or to accommodate an invitation, if it is an invitation to a wedding, anniversary or other celebration.
What you'll need for the job. If you liked this variant of the card, you need to take:
- a beautiful lilac-colored paper;
- designer paper of the same color with an unusual flower pattern;
- double-sided tape;
- scissors;
- glue;
- purple pebbles;
- a shaped hole punch to create a butterfly;
- decorative scotch tape in pink with hearts.
[H3]How to make a postcard with your own hands[/H3]
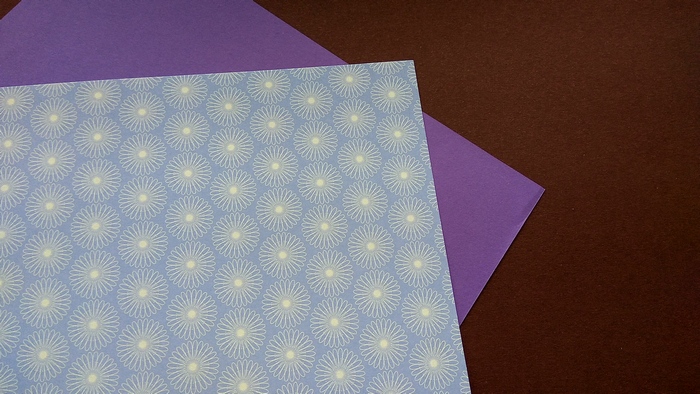
1. Prepare the base of the card - thick sheets of the same tone: purple cardboard and designer paper. These blanks look very elegant by themselves.
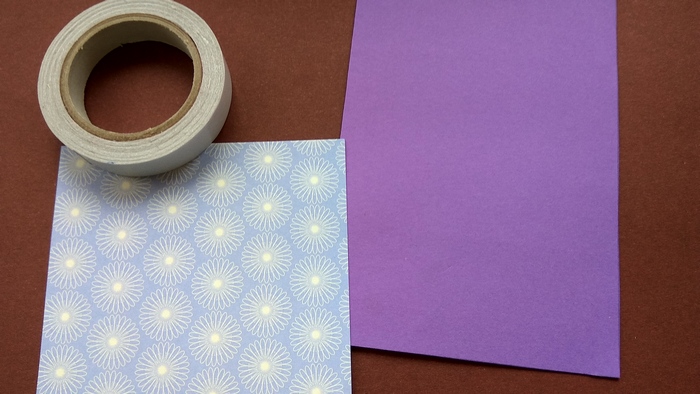
2. Cut the parts from the two prepared sheets, and the purple part should be about 3 cm higher in height. Double-sided tape will help to fix the top layer, it will not wrinkle, and the card as a whole will look neat.
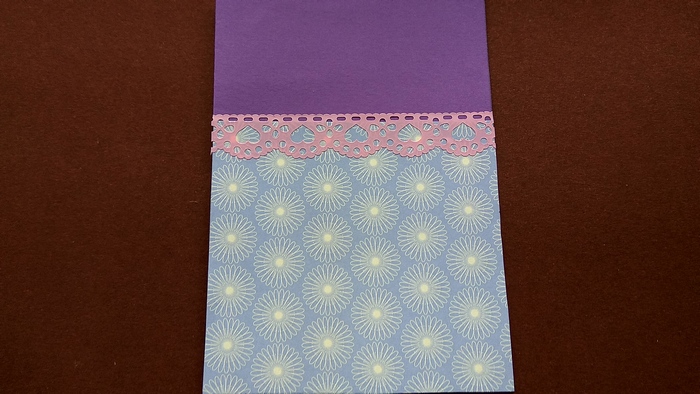
3. Glue the colored sheet with the picture on the purple one, with the bottom part aligned and only the purple paper visible at the top, because we prepared the parts of different sizes. Embellish the joint with a strip of pretty scotch tape with hearts. If you can't find lilac scotch tape on sale, you can use a delicate pink one, as in the case above.
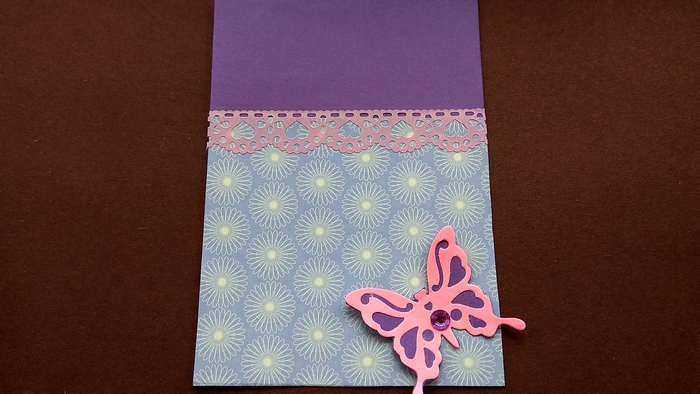
4. Create a butterfly using a hole punch. It can be pink, lilac or purple. Since we used pink scotch tape, the pink butterfly will perfectly echo it, but you can duplicate your fluttering insect with purple paper as well. Glue the butterfly onto the remaining piece of purple paper, cut along the outline, and glue a purple pebble on top. Place the butterfly at the bottom in the corner, be sure to make the wings extend slightly beyond the frame of the card, this will create additional weightlessness and the illusion of volume.
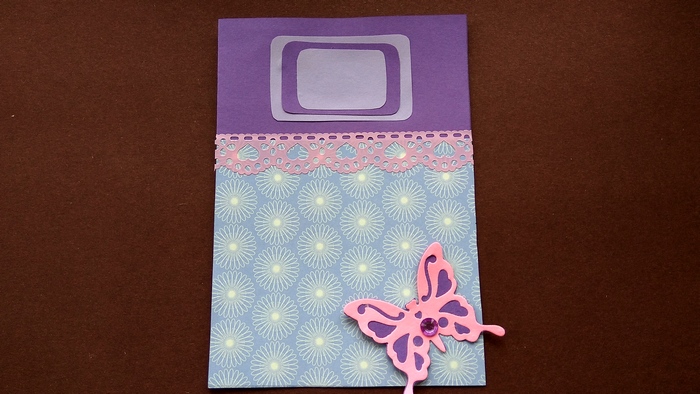
5. Now make a frame for the inscription. Either write the words on the computer and print them out, or use a special font. And in the given case shows the way of modeling a two-color frame. Cut out 3 rectangles of different sizes, the corners of each part must be rounded. It is better to make the upper and lower rectangles lighter, the central rectangle - darker, that is, the same as the main purple color used in the work. Glue the resulting layered copy at the top of the postcard. This will be the place to indicate the addressee.
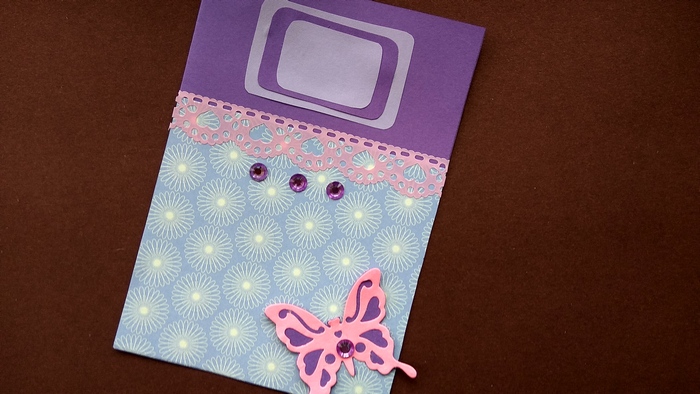
6. The last little touch that will decorate the card is the purple pebbles, the same ones we used to decorate the butterfly. Glue the pebbles approximately in the center under the strip of decorative tape.
7. The beautiful greeting card is ready. It looks elegant and festive.


