
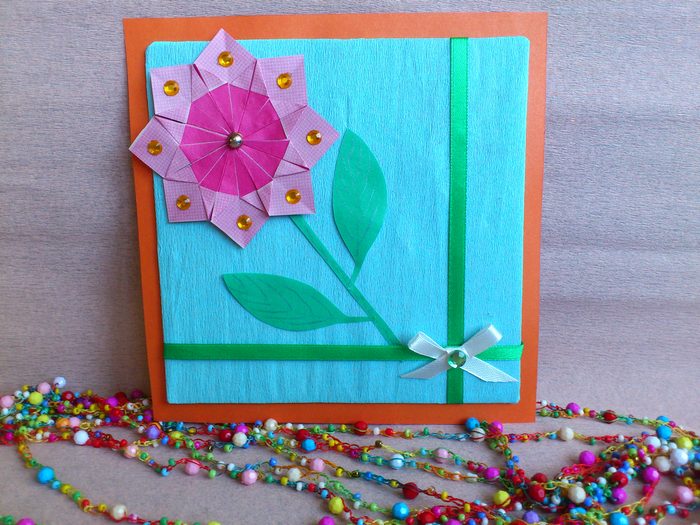
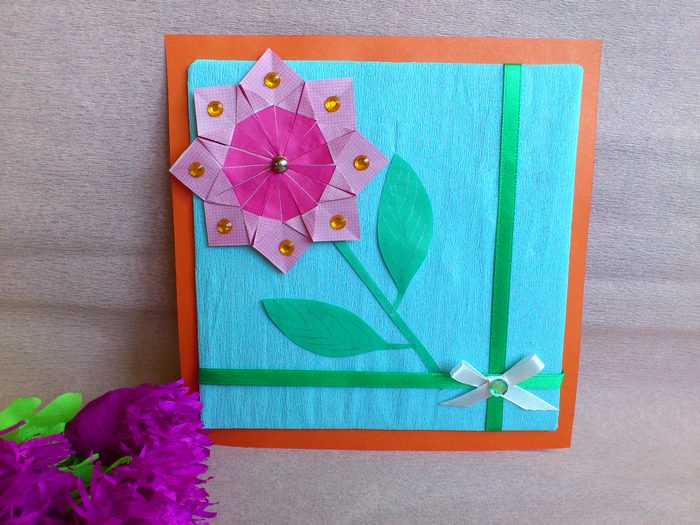
 Making greeting cards is probably the most popular type of creative work with children. If there is a stimulus in the form of congratulations to a loved one, the work comes together with special enthusiasm. The final photo shows an interesting model of a postcard, which is not difficult to make with your own hands. When she may need it? If there is a question of congratulating your mother or grandmother with the name day, International Women's Day, if you need to congratulate the educator with or teacher with Teacher's Day, also a postcard can be prepared for Mother's Day or any other holiday. The presented card is mainly made of paper, but other materials are also involved. Thus, the product turns out to be even more interesting, there is a volumetric 3D effect. If you like the shown card, you can easily repeat it, thereby learning to make flowers from modules - it is very interesting.
[H3]To make an interesting postcard, prepare:[/H3]
- Dense cardboard;
- Corrugated paper or fabric;
- Glue;
- Green and pink thin paper;
- The rhinestones are sticky;
- A thin satin ribbon or tourniquet;
- Scissors;
- Ruler;
- Glosses or metallic pens.
How to make a card with your own hands
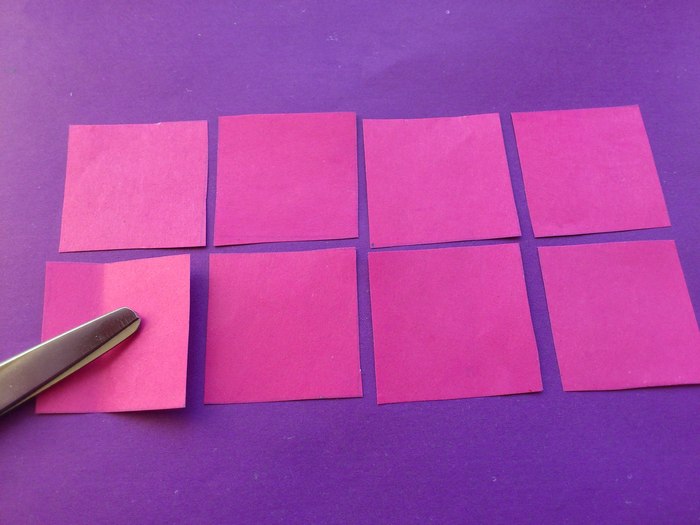
1. Let's start with creating the petals of the flower. It is a large flower that will be the central decoration of an unusual card. It is necessary to prepare paper modules for making the specified details.
2. Cut the bright pink paper into squares. You will need a total of 8 squares with a side of about 4 cm or other size.
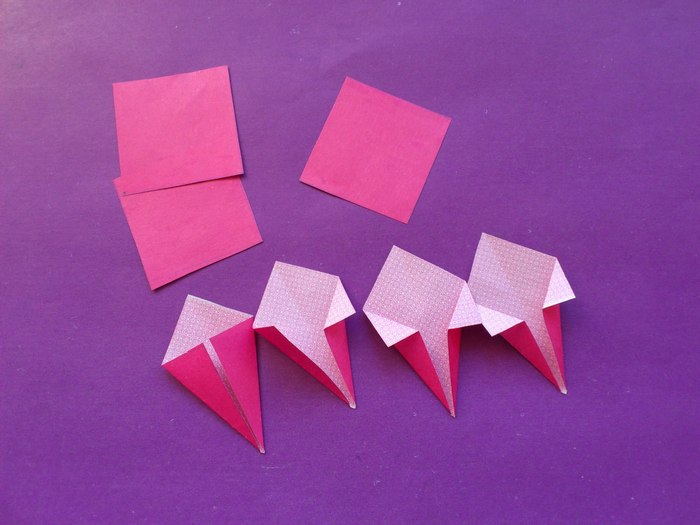
3. It would be good if the paper used was single-colored or even multicolored on both sides. On the second photo you can see the process of modeling the modules. You can see at once why it is better to take multi-sided paper. In the process of folding, the second side will look beautiful. Each square fold diagonally in half, then 2 adjacent sides join along the center fold line, bend the top corners outward. Thus, you will get a kind of two-color envelopes.
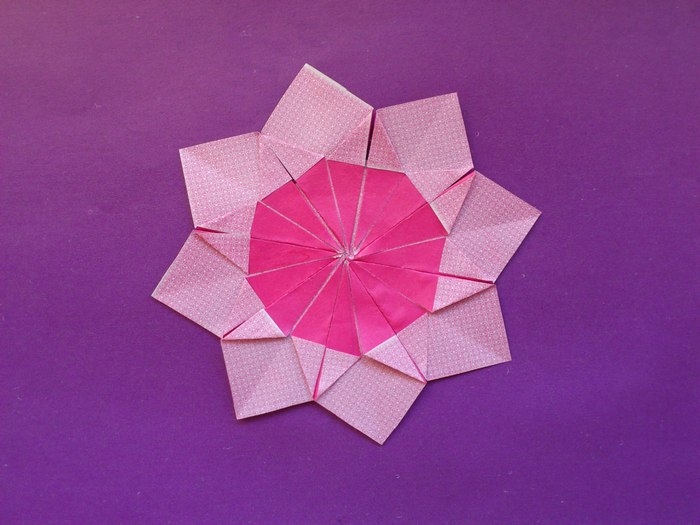
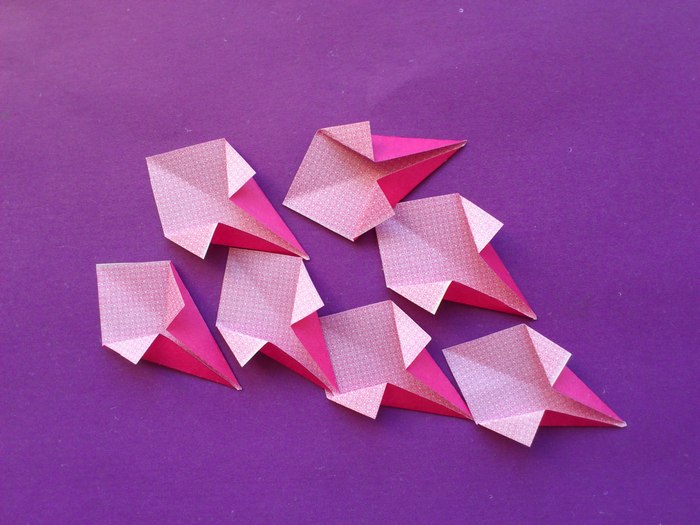
4. Make 8 such envelopes from all the prepared squares.
5. Glue the petal modules onto the paper round base. Do it carefully, perfectly aligning the corners, barely touching their sides. The beautiful flower is already visible.
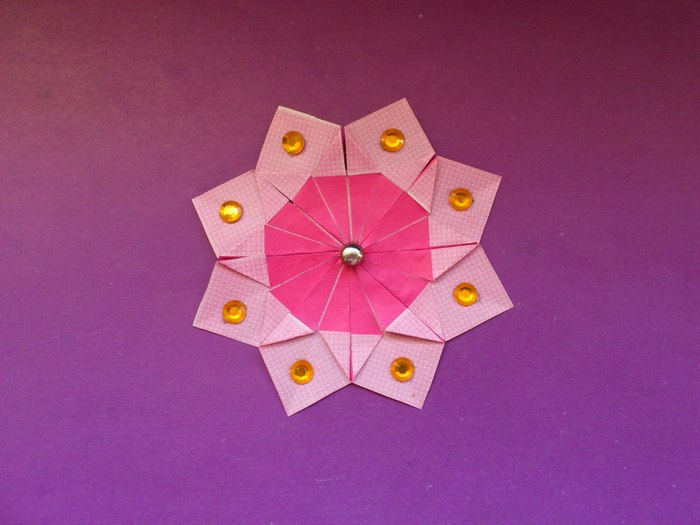
6. Decorate the flower with half beads in the center and on the petals.

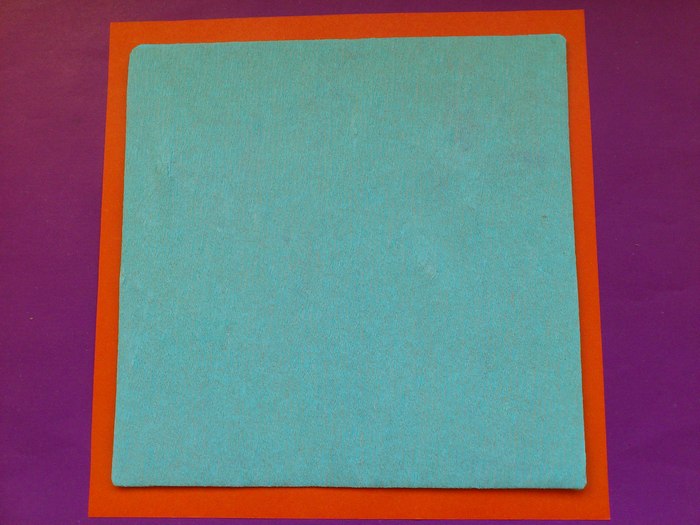
7. Prepare a brightly colored card base. Cut out a square or rectangle of brightly colored cardboard. Glue a second rectangle, but smaller in size, on top. You can cover the paper of the top layer with a layer of corrugated paper. Thus, the card will turn out interesting, textured, in a beautiful bright frame.
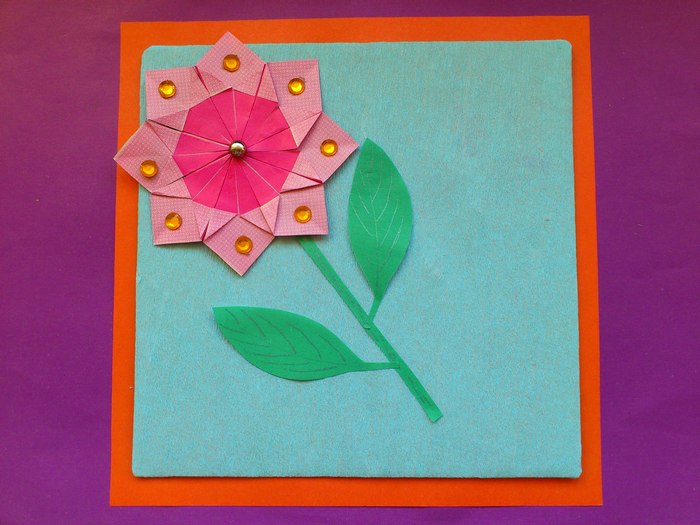
8. Glue a thin green stem with leaves in the center. Draw veins on the leaves with a metal pen.
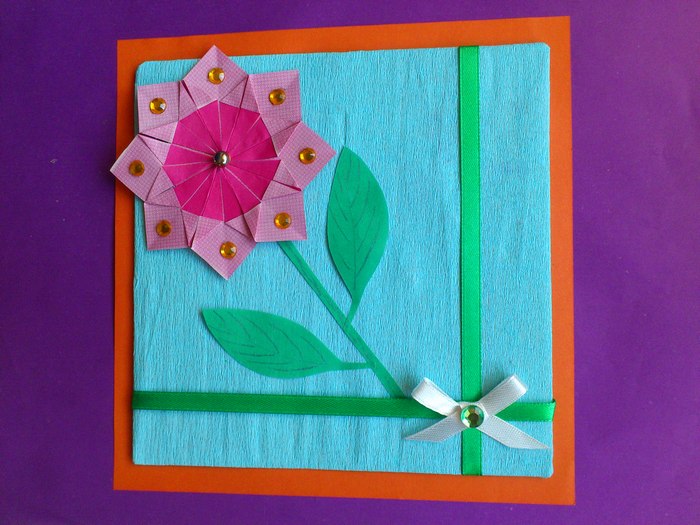
9. Glue the flower you have created.
10. Glue satin ribbon to the sides and bottom, you can put it under the top layer of cardboard. Cross the ribbons. Glue a bow with a half bead at the junction.
Greeting card created.


