
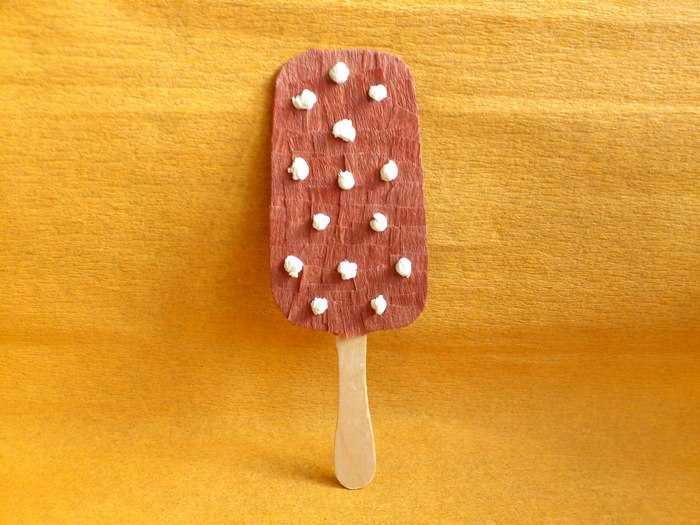
 In summer, you don't want to eat anything but the most delicious and desirable for children popsicles. Stores sell all kinds of ice cream, but perhaps the most popular is the chocolate treat on a stick. Kids can buy the candy at the store, but what about the toys. After all, they too would like to taste the cold popsicle. For them, an interesting craft from paper, made with their own hands, will be suitable. This master class tells how to make an appetizing ice cream for the game. To make it more believable, make a base of a similar shape, use a real wooden popsicle stick, and use brown and cream paper with a soft texture. Everyone can make such a craft.
What you'll need for the job:
- cardboard is just plain gray cardboard from any box;
- brown and cream corrugated paper;
- a flat wooden popsicle stick;
- scissors;
- the stationery glue that holds the paper together.
[H3]How to make ice cream out of paper with your hands[/H3]

1. Everything you need for the work is specified in the list. It is better to use corrugated paper, so that the surface of the craft was rough - this is the main feature of such rolls. From the brown sheet we will create the body of the popsicle, as if covered with sweet chocolate, from the creamy one we will roll lumps, which will become finely chopped nuts.
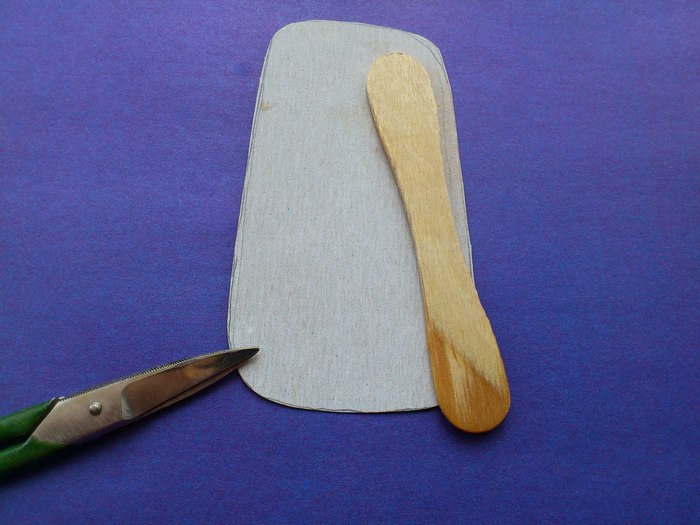
2 Cut out a rectangular template with rounded edges from the prepared cardboard - a standard chocolate ice cream body. Also prepare a stick. To make a symmetrical on both sides of the craft, cut out 2 identical parts. First draw an outline with a simple pencil, then cut along the contour. Use the first part as a template, lean against the second piece of paper and cut out the second half according to the finished product. The two parts of one popsicle should be exactly the same.
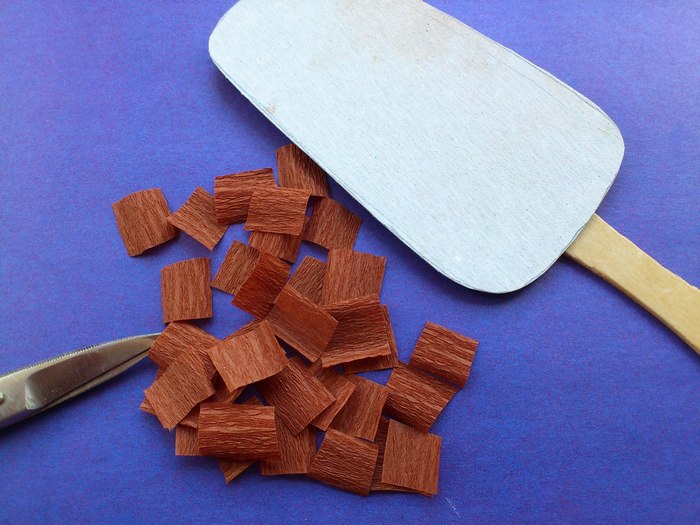
3. Glue the body of the craft. Align the 2 cardboard pieces, place a stick between them so that it peeks out from the bottom. Smear with glue, press, smooth and set aside for the glue to dry. For now, create the details for decorating the surface of the product. First of all, it will be small squares of brown shape. Make a lot of such details to completely cover both sides of the craft.
4. Glue the squares overlapping on the gray paper surface. Overlap the squares on both sides of the gray paper.
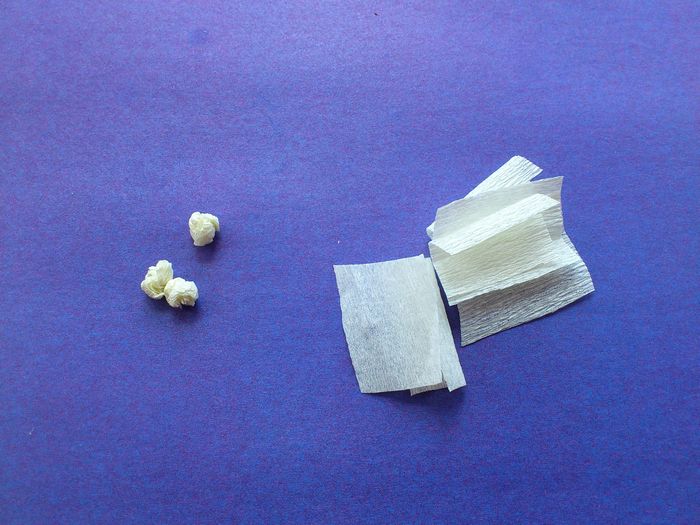
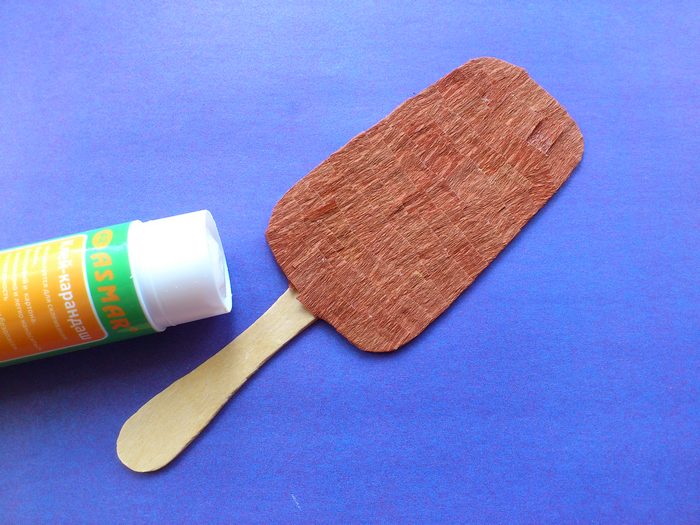
5. Now cut the cream paper into the same squares, but in much smaller quantities. Roll each light colored square into a small ball with your fingers. These will be the nut pieces that cover the chocolate surface.

6. Finally, all that remains is to glue the small lint to the surface of the brown paper in any order.
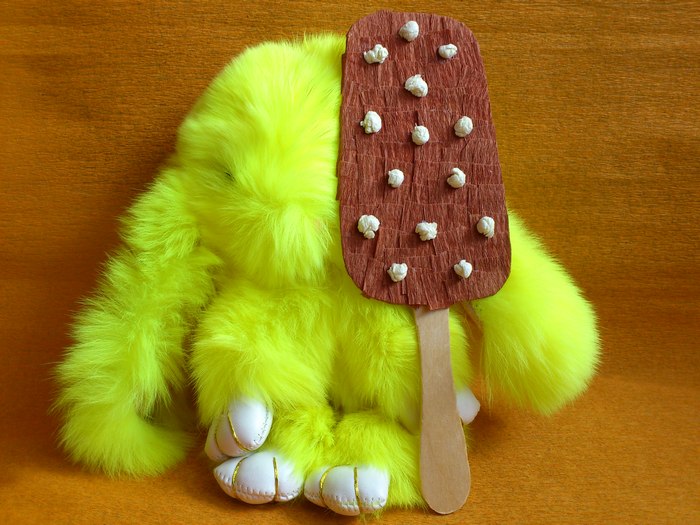
The popsicle on a stick is ready. It is just begging to be eaten by the toys. It is so interesting to create such simple crafts, and even a copy of the ice cream that all children love.


