
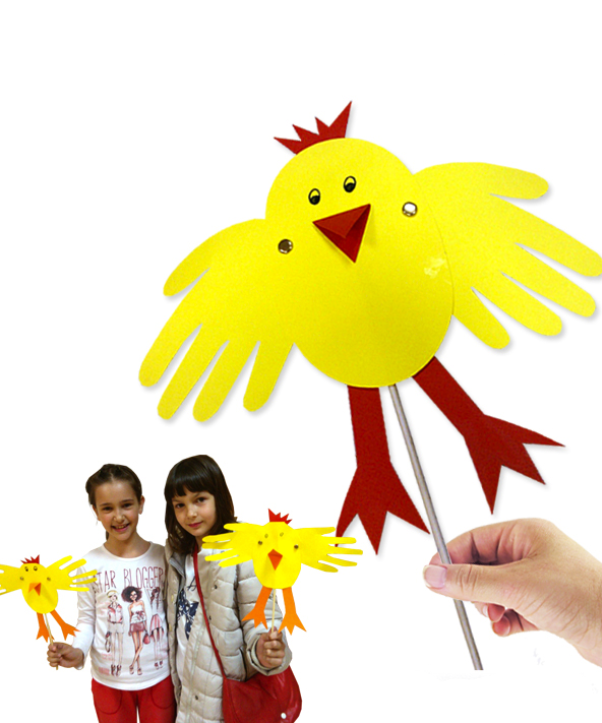
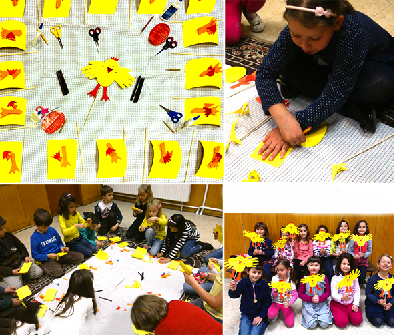
Paper crafts are not only a way to spend time creatively, but also a great opportunity to develop a child's fine motor skills, attention and accuracy. Especially popular are seasonal and themed crafts, for example, for Easter or spring holidays. In this material we will consider how to make a simple but expressive paper chicken. It is suitable for home entertainment, classes in kindergarten or elementary school. The work can be done together with your child in just 30-40 minutes.
Materials that will be needed
You don't need anything unusual for this craft. Everything you need can be found at home or purchased at the nearest store:
- Yellow and orange paper (preferably heavy paper or cardboard);
- White paper or cardboard for eyes;
- A black felt-tip pen or marker;
- Pencil glue or PVA;
- Scissors;
- Pencil and ruler;
- A compass or round object for circling (such as a glass).
Step 1: Preparing the body base
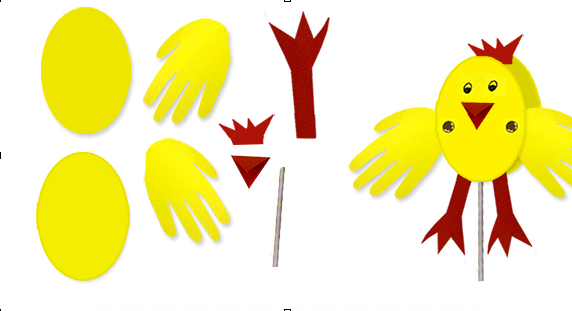
Let's start with creating the body of the future chicken. From yellow paper cut out a circle with a diameter of 10-12 centimeters. This will be the body. If the craft is supposed to be tabletop, you can make two such circles and glue them together to keep the chicken shape. If desired, you can replace the circle with an oval shape - it will turn out more naturalistic.
Step 2: creating wings, paws and beak
Cut out two smaller ovals from the same yellow paper - these will be the wings. You can glue them on the sides, slightly tilting them down or up, depending on the desired pose.
From orange paper make a beak - a small triangle, which is folded in half to make a volume. Glue it closer to the center of the circle. Below add two small paws. You can draw them by hand or use a ready-made template by cutting out three "fingers".
Step 3: eye and facial expression design
For the eyes we use white paper - cut out two small circles, about one centimeter in diameter. In the center draw black pupils with a felt-tip pen. Glue the finished eyes over the beak. You can move them a little to the sides - you will get a cute expression.
If desired, you can add eyebrows, eyelashes or even make the eyes movable by fixing them on a pin. This will give the craft an emotional touch.
Step 4: additional details
To make the craft look complete, you can add a small tuft on top. To do this, cut three strips of yellow or red paper, twist the ends and glue them to the top of the head. You can also cut out grass from green paper and glue it at the bottom to make a complete composition.
If you are making a chicken for Easter, you can add a half egg made of white paper behind it. The cut of the egg is decorated with teeth, as if the shell had cracked.
Step 5: placement and decoration
The finished chicken can be glued on a card, hung on a string or set vertically with a stand. To do this, glue a folded triangle-shaped strip of cardboard to the back of the circle. This will allow the craft to stand on its own.
You can also use a clothespin to attach the chick to the edge of a cachepot, book, or pencil cup, for example.
Conclusion
Such crafts are easy to make, safe for children and universal in theme. It can be easily adapted for different holidays, used in decoration or as part of a gift. The main thing is not to be afraid to experiment with colors, shapes and details. Even a simple paper figure can become bright and memorable if you put a little imagination and warmth into it.


Wow,I'm really going to try it.