
Introduction
A desk organizer is an indispensable thing in any home. It helps to put things in order, free up workspace and organize everything that is usually scattered around the table. Make an organizer with your own hands - a great idea for both adults and children. This is not only a practical object, but also a fascinating creative project that can be adapted to your needs. And the main thing is that it does not require any expenses: everything you need can be found at home.
Materials needed
- Dense cardboard (e.g. from shoe boxes)
- Office knife and scissors
- PVA glue or glue gun
- Ruler and pencil
- Colored paper, wallpaper or decorative fabric for covering
- Decorative elements: ribbons, buttons, stickers
Step 1: Planning
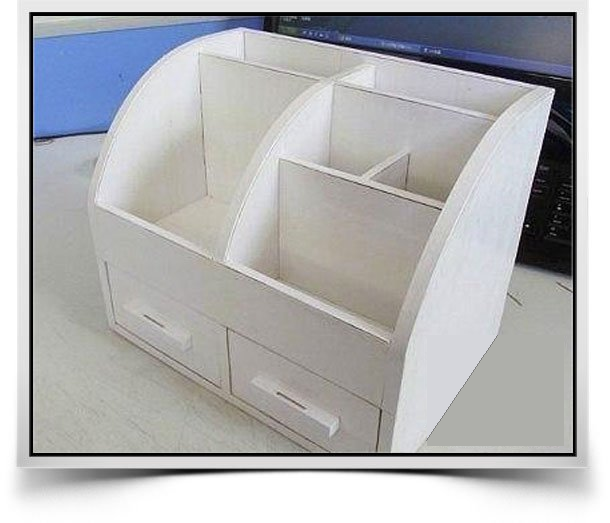
First, determine exactly what you will be storing in the organizer. It can be pens, paper clips, pencils, pencils, brushes, notebooks, etc. Then draw a diagram of the future organizer with the dimensions and location of the sections. This will help you understand how many dividers and what sizes of blanks you will need.
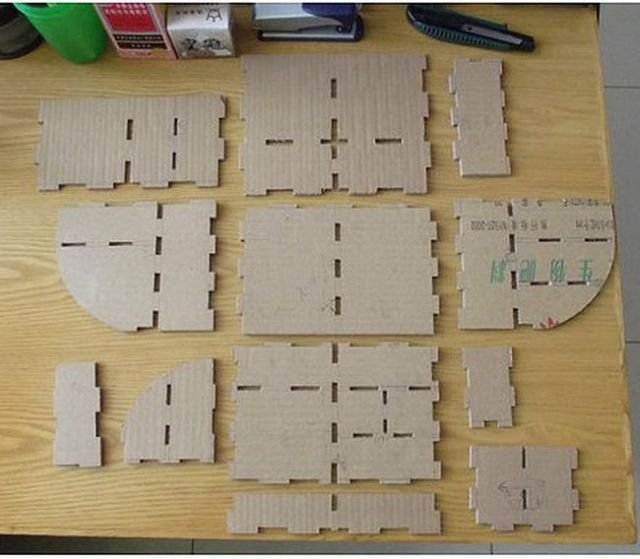
Step 2: Preparing the parts
Draw the necessary elements on cardboard and carefully cut out: base, side and back walls, inner partitions. If desired, glue the walls from two layers of cardboard for strength. It is better to label all the parts so that they are not mixed up during assembly.
Step 3: Assembling the base
Glue the side and back panels to the base. Make sure they are level and securely fastened. Use clothespins or clips until they are completely dry. This will ensure the stability of the entire structure.
Step 4: Installing the partitions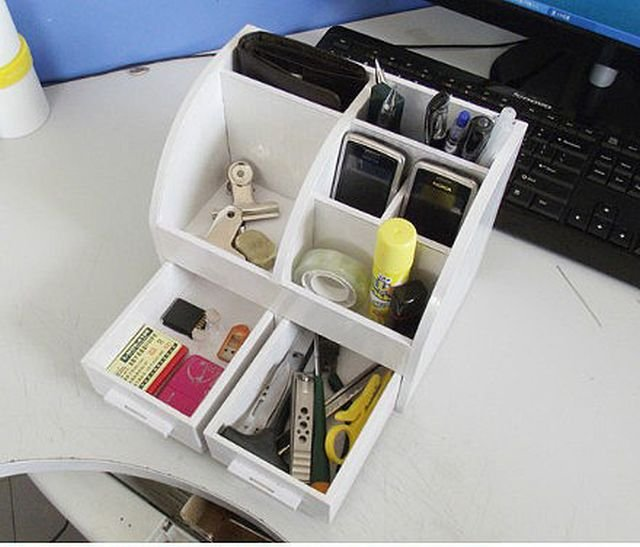
Insert internal partitions according to your sketch. These can be either horizontal or vertical sections. You can make "multi-storey" cells using tea cartons or egg cartons.
Step 5: Covering
When the construction is completely dry, you can start decorating. Cover the organizer with colored paper, kraft, fabric or leftover wallpaper. Gently fold the edges of the paper inward. Use glue stick or PVA. You can also paint the organizer with acrylics.
Step 6: Decor
Add personality: stickers, tags, decorative buttons, braid, lace. Inscriptions or drawings look good if the organizer will be used by a child - you can even leave space for a photo or schedule.
Completion
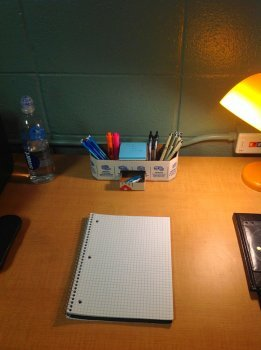
Check that everything is secure, remove any glue residue and trim off any excess. Now the organizer is ready for use - place it on your desk, fill it with contents and enjoy the order.
Application options
- For stationery: pens, pencils, paper clips, rulers.
- For cosmetics: brushes, lipsticks, mascaras.
- For jewelry: earrings, rings, bracelets.
- For needlework: thread, buttons, needles.
- For technology: cables, flash drives, headphones.
- Children's corner: crayons, stickers, figures.
- Gift: A beautifully designed organizer is a great idea for September 1, New Year's Eve or birthday.
Additional tips
- Use tea boxes for small items.
- Use cardboard of different thicknesses - this will give stability.
- Use double-sided tape if you don't want to wait for the glue to dry.
- When working with children, prepare the parts ahead of time for them to do the assembly and decorating.
Conclusion
Creating a desk organizer from cardboard is a useful, interesting and environmentally friendly activity. You get not just a box, but a stylish accessory that reflects your taste and simplifies your daily life. And if you approach the process creatively, you can even make a whole collection of organizers for different tasks.


