
Introduction
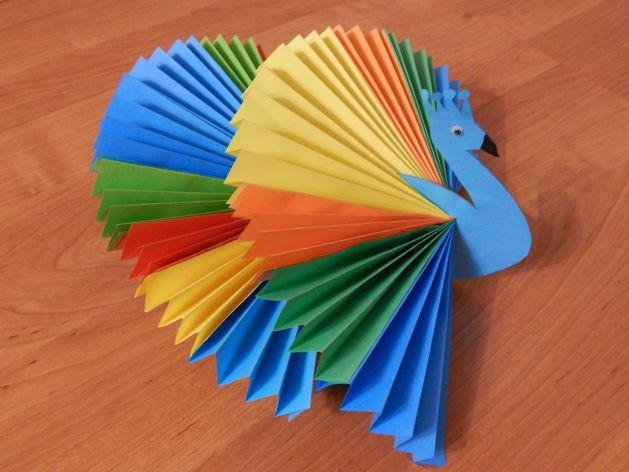
In the world of needlework, a special place is occupied by crafts that not only please the eye, but also carry a symbolic meaning. The "Bird of Happiness" is just such a work. Bright, airy, colorful - it is perfect as a gift, and as a decoration of the house, children's room or holiday decoration. Everyone can make such a bird - from a child to an adult. And pleasure from the process is guaranteed.
Materials:
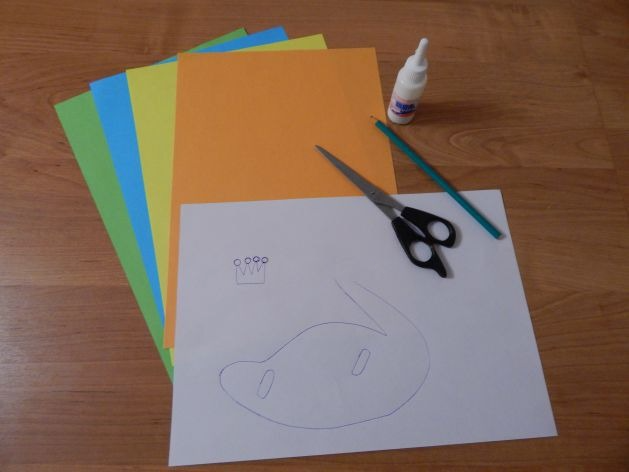
- Colored paper (double-sided, different weights)
- Cardboard (for the base)
- Scissors (better with rounded ends for children)
- PVA glue or glue gun
- Pencil, ruler
- Florescents, markers, glitter, sequins (optional)
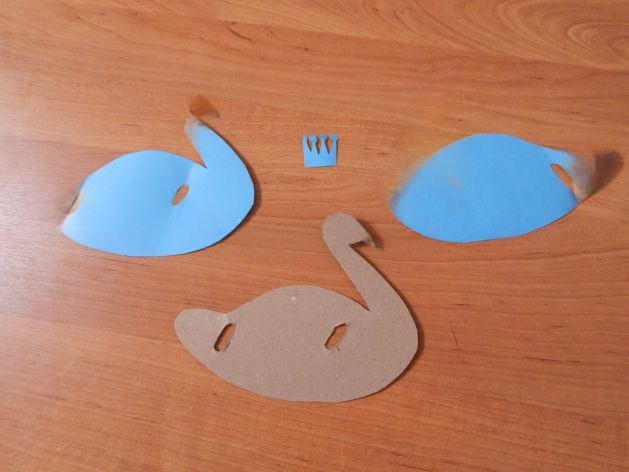
Step 1: Preparing the base
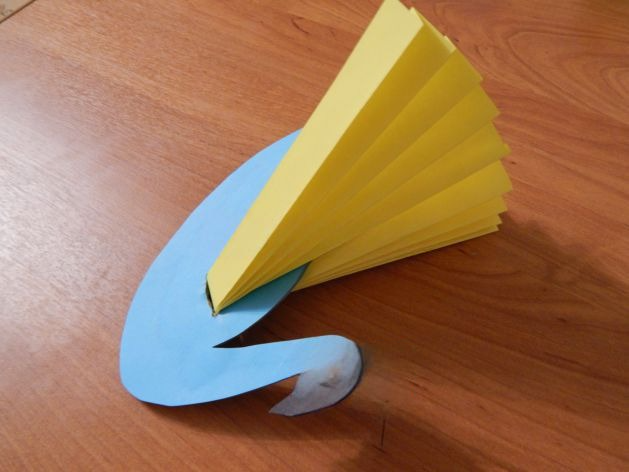
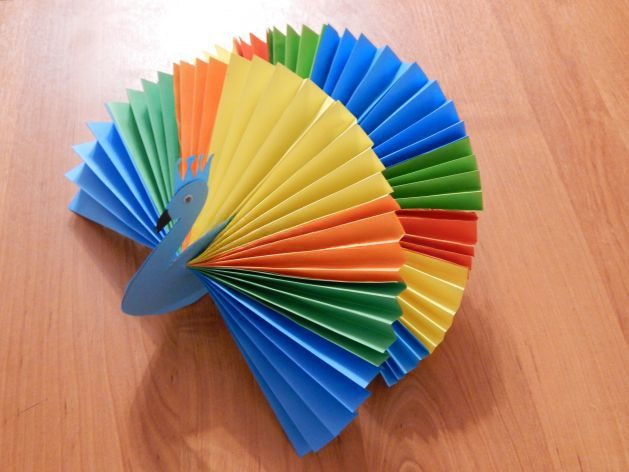
On a sheet of cardboard, draw a silhouette of a bird - a body with a head, without wings and tail. This is the base to which everything else will be attached. Cut out the contour. It is better to use dense cardboard - it will give stability to the construction.
Step 2: Harmonica wings
Take colored paper and fold it into a classic accordion shape about 1 cm wide. The longer the paper, the bigger the wing will be. Fold the accordion in half and glue in the center to the body - this is one wing. Repeat for the second one. You can make symmetrical or slightly different in shape, color and size - it will be spectacular.
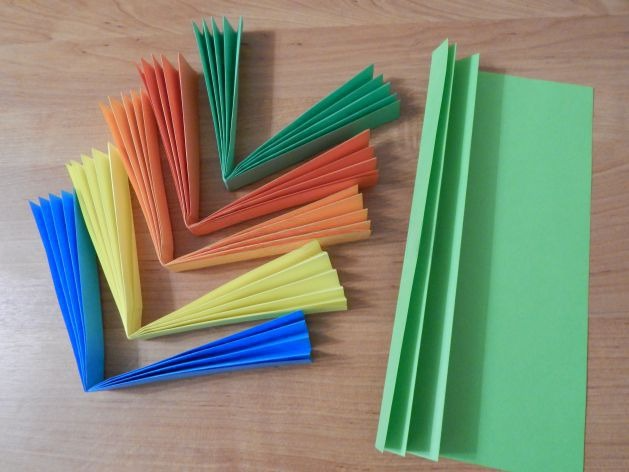
Step 3: Tail
For the tail, use a different shade of paper. Again fold into an accordion, but you can take a wider one - 2-3 cm. Glue the accordion to the back of the bird. If you make two or three layers of different colors, you will get a festive fan.
Step 4: Details and decoration
Draw eyes, beak, and patterns on the body. Cut out the beak separately from orange or yellow paper and glue. You can use glued eyes (creative eyes), add feathers, glitter, marker patterns. The edges of the wings look beautiful if you cut them out with shaped scissors.

Step 5: Suspension
Make a hole in the upper part of the body and thread a string, ribbon or fishing line through it. Now you can hang the bird under the ceiling, on a window, in a doorway or even on a chandelier. A group of several pieces will make a composition.
Additional tips
- Use different types of paper: corrugated, shiny, with print - it will give the bird uniqueness.
- Several different sized birds suspended at different heights create a beautiful mobile installation.
- Wings and tail can be decorated with cut-out elements, patterns, applique.
- Beak and eyes are better to make separately - it gives expressiveness.
- When creating with children, prepare templates ahead of time so you don't have to spend a lot of time cutting out the base.
Application ideas
- Decor for the holidays - especially appropriate for New Year's Eve, Pancake Day, Bird Day.
- The mobile above the crib is safe, lightweight, and educational.
- A gift or card - attach to the cover, it will be symbolic and beautiful.
- Cool work - suitable for contests and exhibitions of children's art.
- Decorating a window or balcony - especially in the spring.
Developmental effect
The crafts train attention, diligence, motor skills and color sense. It is especially important that the result is quick and beautiful - it inspires the child and gives him/her self-confidence.
Conclusion
"Bird of happiness" from paper is not just a cute craft. It is a symbol of joy, inspiration and peace made with your own hands. Create it at home, at school or at a master class and you will get not only a beautiful decoration, but also positive emotions from the process itself. The main thing is to put a bit of warmth into it.


