
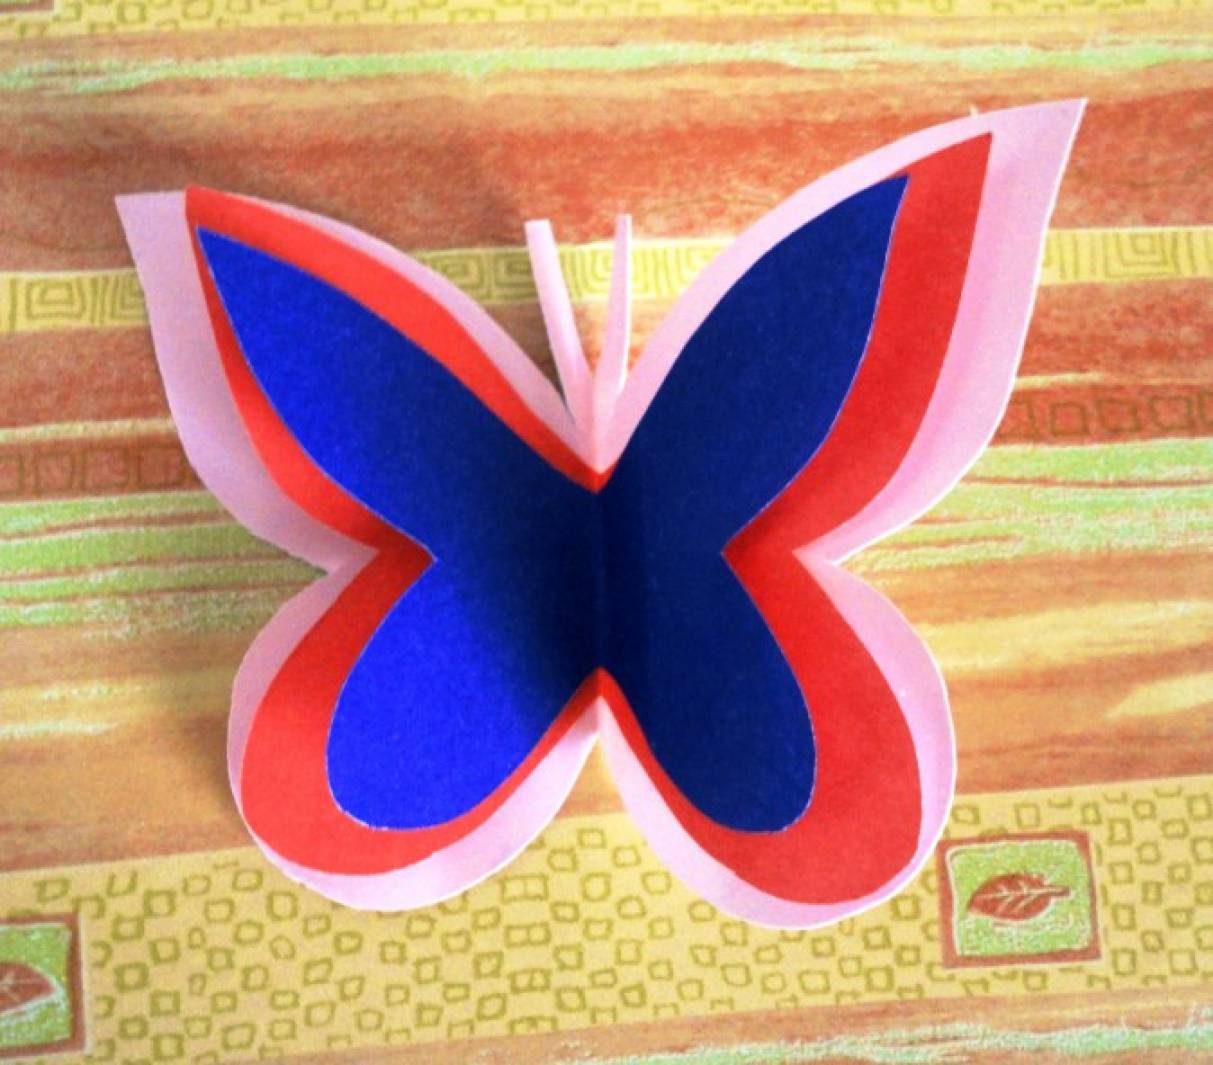
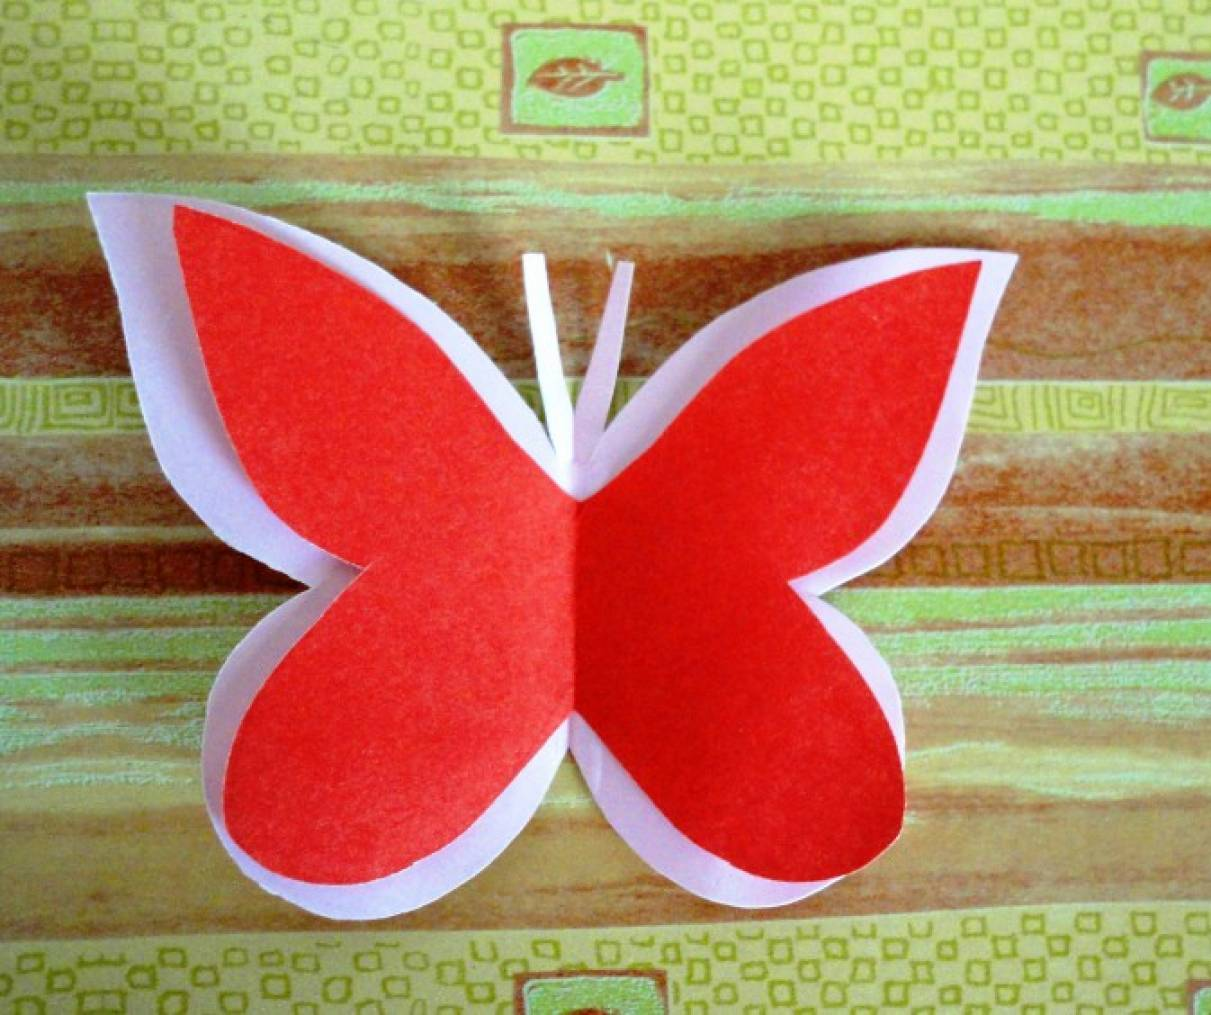
This craft is perfect for home creativity with children, as well as for interior decoration, cards, gifts or decorations in kindergarten. The butterfly turns out not only beautiful, but also quite durable, if you use thick colored paper. You can make such a butterfly literally in 20-30 minutes, and the whole process will bring pleasure to both children and adults.
Materials that will be needed:
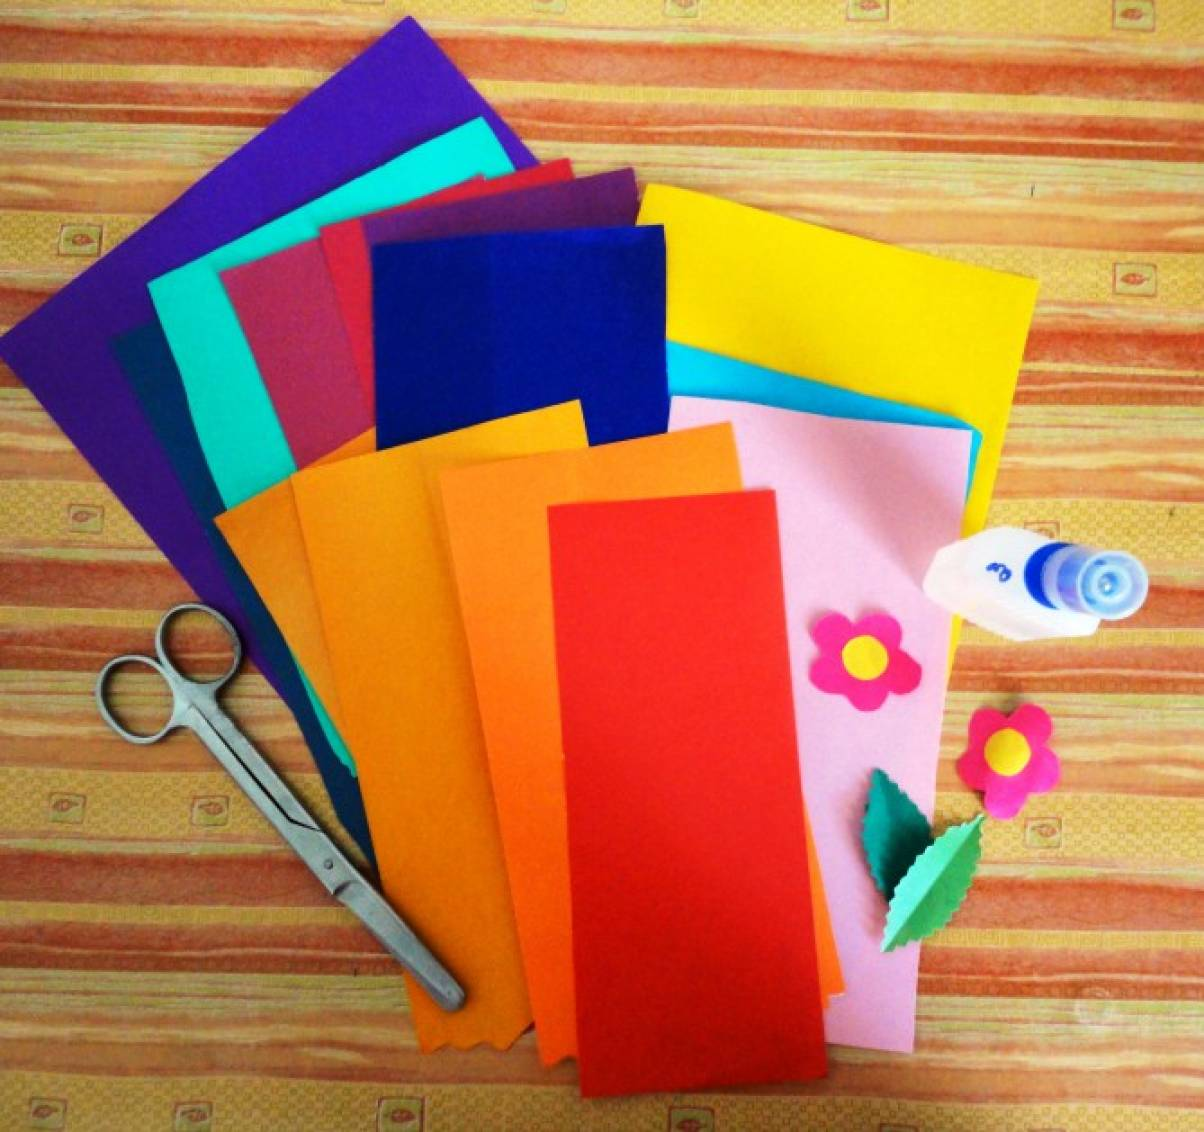
- Colored paper (preferably double-sided or decorative)
- Office scissors with sharp ends
- Pencil glue or stationery PVA
- Marking pencil
- Ruler
- Toothpick or thin stick for curling tendrils
- Clip or clip (optional)
Read also: Origami for windows: Summer decorations 2026
Step 1: Preparing the paper strips
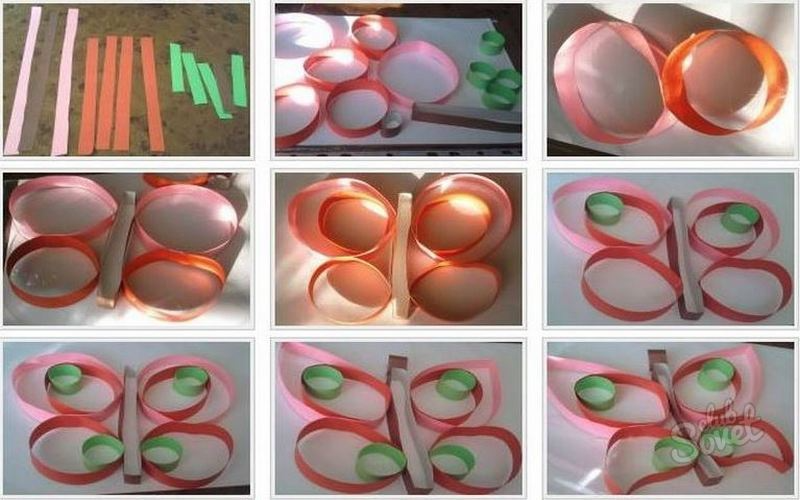
First, let's decide on the colors. It is best to choose two or three contrasting colors - this will give the butterfly brightness and expressiveness. Cut the paper into strips of different lengths:
- 3 strips 15 cm long and 1.5 cm wide - for the upper part of the wings
- 4 strips 10 cm long and 1.5 cm wide - for the middle
- 5 strips 7 cm long and 1.5 cm wide - for the bottom part
The strips can be slightly rounded at the edges - this will give the finished butterfly soft shapes.
Read also: Butterfly moth made of clothespins and candy wrappers
Step 2: Shape the rings
Carefully glue each strip into a ring. It is better to use glue stick: it does not spread and does not deform the paper. After gluing, wait a little while for the glue to set. You can use clothespins to speed up the process.
Step 3: Create butterfly wings
Now start assembling the wings. Take one big ring, put the middle one into it, and then the small one. Glue them together so that we get a kind of triple drop. Repeat the same actions with the second three rings. These will be two symmetrical wings.
Step 4: Making the torso
The body of the butterfly can be made from a strip of paper 2 cm wide and 6-7 cm long. Fold it in half lengthwise to make a thicker base and shape it by slightly rounding one end - this will be the head. The antennae can be twisted from thin paper strips, or you can use thread or wire. Using a toothpick, carefully twist the ends to make them look like spirals.
Step 5: Final assembly
First glue the wings to the torso - two on each side, starting with the larger ones on top. Make sure everything is symmetrical. Then glue on the antennae. Allow the glue to dry well. If necessary, trim the edges of the wings.
Step 6: Decoration and decoration
You can decorate the wings with glitter patterns, felt-tip pens, stickers or colored dots. You can also glue a magnet to the back of the butterfly if you want to place it on a refrigerator or metal surface. Another option is to attach a string and hang the butterfly as a mobile.
Alternative applications and ideas
Such paper butterflies can be used not only as an independent craft. Here are some interesting ideas:
- Decorating gift boxes: glue a butterfly on the lid and the most ordinary gift will become original.
- Wall decorIf you make several butterflies of different sizes and colors, they can be placed on the wall as a composition - for example, creating the effect of flight.
- Postcard applicationsThe butterfly will be perfect as an element of a birthday card, or other holidays.
- Children's masqueradesBy attaching a butterfly to a hoop or stiletto, you will get a cute accessory for a fairy or forest spirit costume.
- Training projects: schools and kindergartens are often asked to bring in crafts with a spring or nature theme - a butterfly is perfect.
Safety and age
This craft is recommended for children from 6 years old with adult supervision. The use of sharp scissors requires caution. It is better to prepare strips in advance, so that children can focus on the creative part - gluing and decorating. The process develops fine motor skills, accuracy and artistic taste.


