
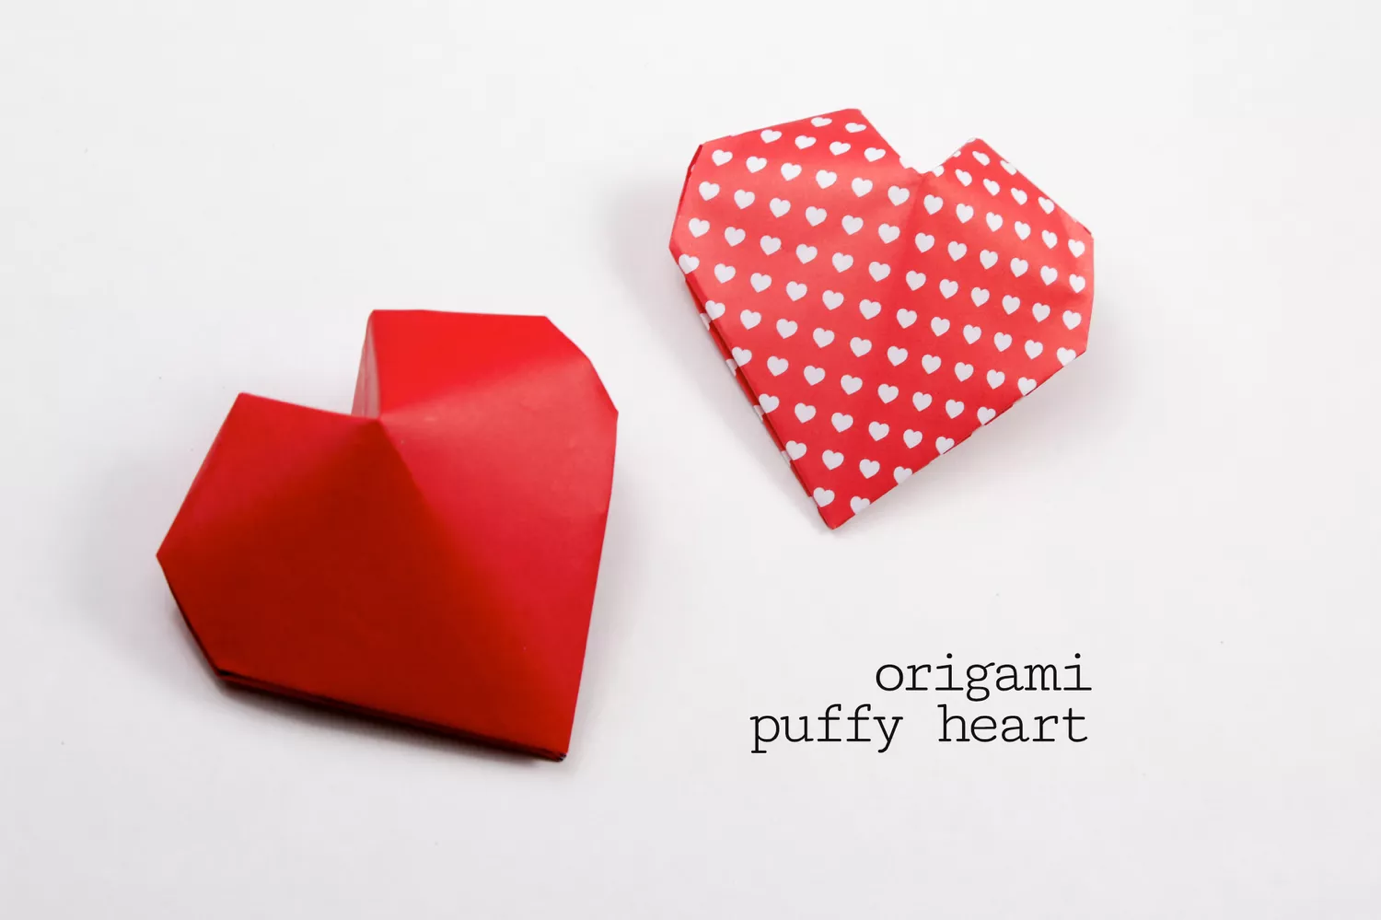
Sometimes you don't need expensive gifts to express your feelings. A warm, handmade sign of attention is enough. A volumetric origami heart is an ideal option! It looks spectacular, is created quickly and requires nothing but paper and a drop of patience. I tell you how to fold such a miracle step by step!
Materials that will be needed
You'll need a minimal kit to get the job done:
- One sheet of square paper (office paper or special origami paper will do);
- It is desirable to choose double-sided paper - then the heart will turn out bright and lively on both sides.
The size of the paper depends on how big you want the final result to be. The larger the sheet, the larger the heart.
Step 1: Preparing the base
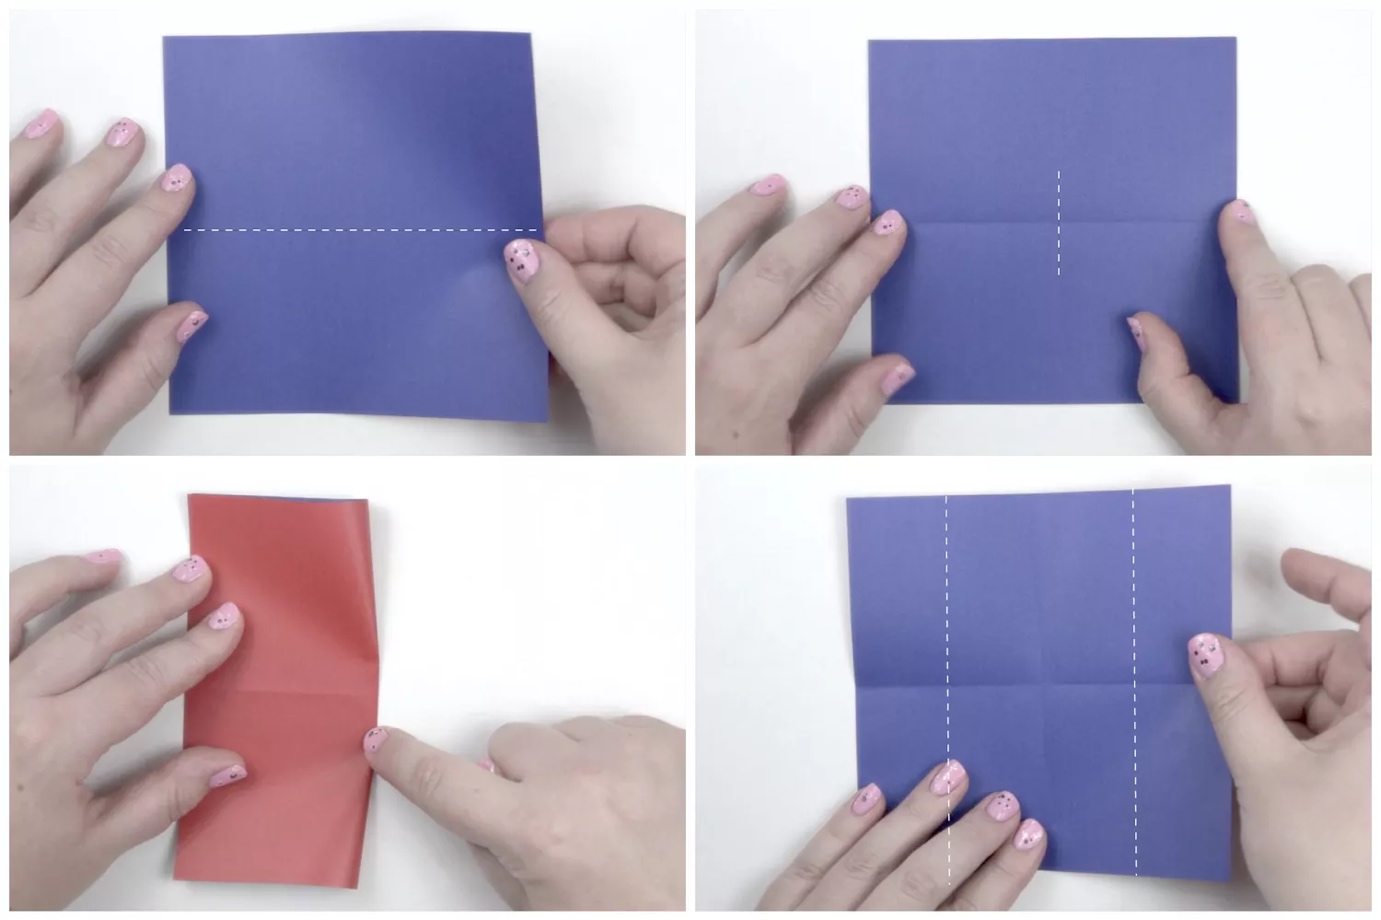
Take a square piece of paper. Lay it in front of you so that it looks like a rhombus, with the corner pointing upwards. Carefully fold the sheet in half vertically, then unfold it and fold it horizontally again. You will have a cross of folds - they will help guide you through the next steps.
If the folds turn out uneven, it is better to correct immediately - the quality of the initial lines depends on the accuracy of the entire figure.
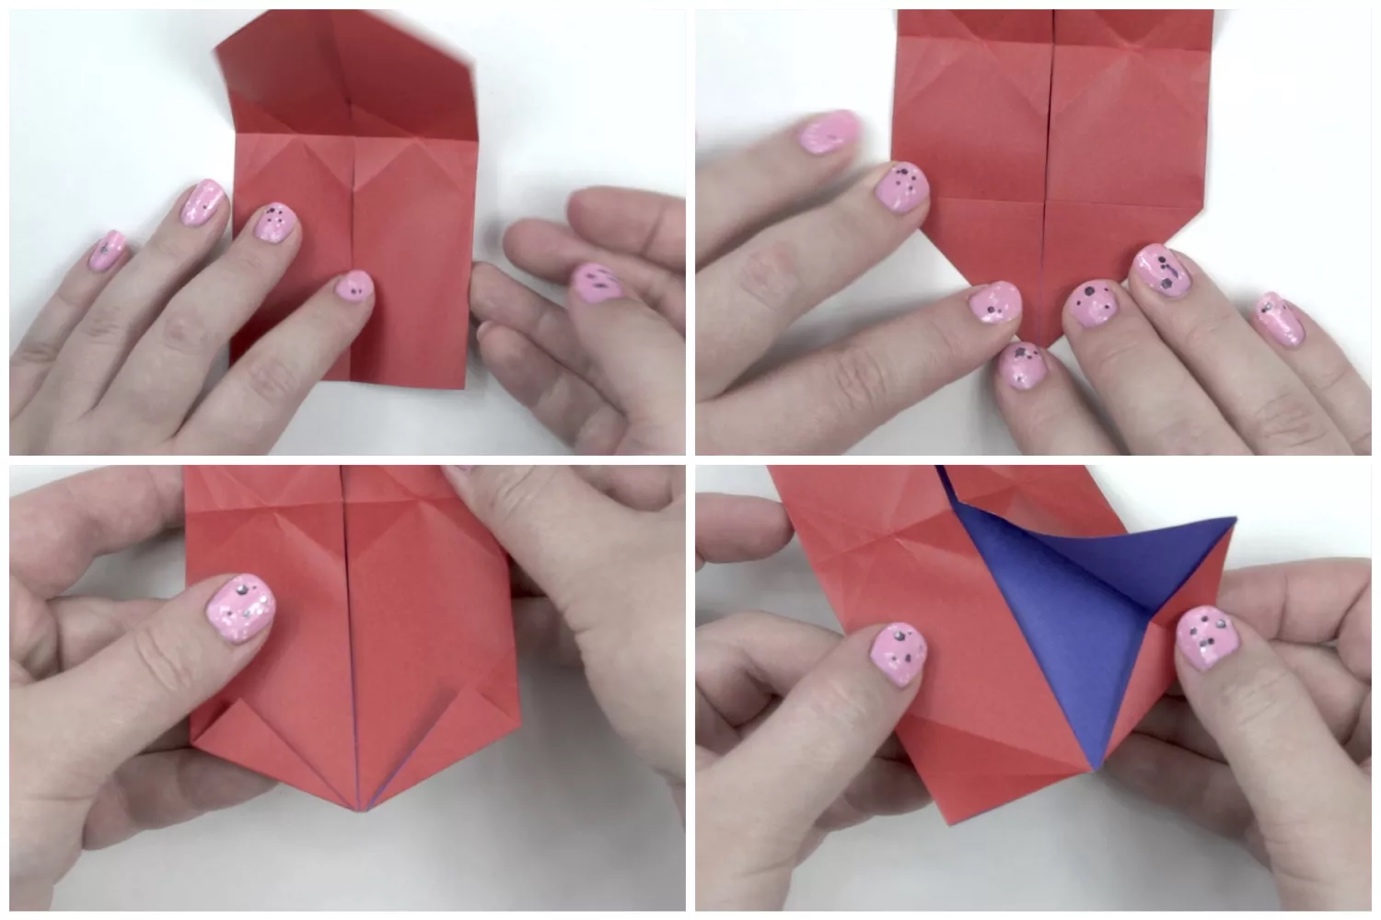
Step 2: Fold diagonally
Now fold the sheet on one diagonal, then the other. You will get an "X" on the background of the existing cross. At this stage, it is important to carefully iron each fold so that the paper "memorizes" the lines. The clearer the curves are, the neater the volume will come out.
Step 3: Form the base form

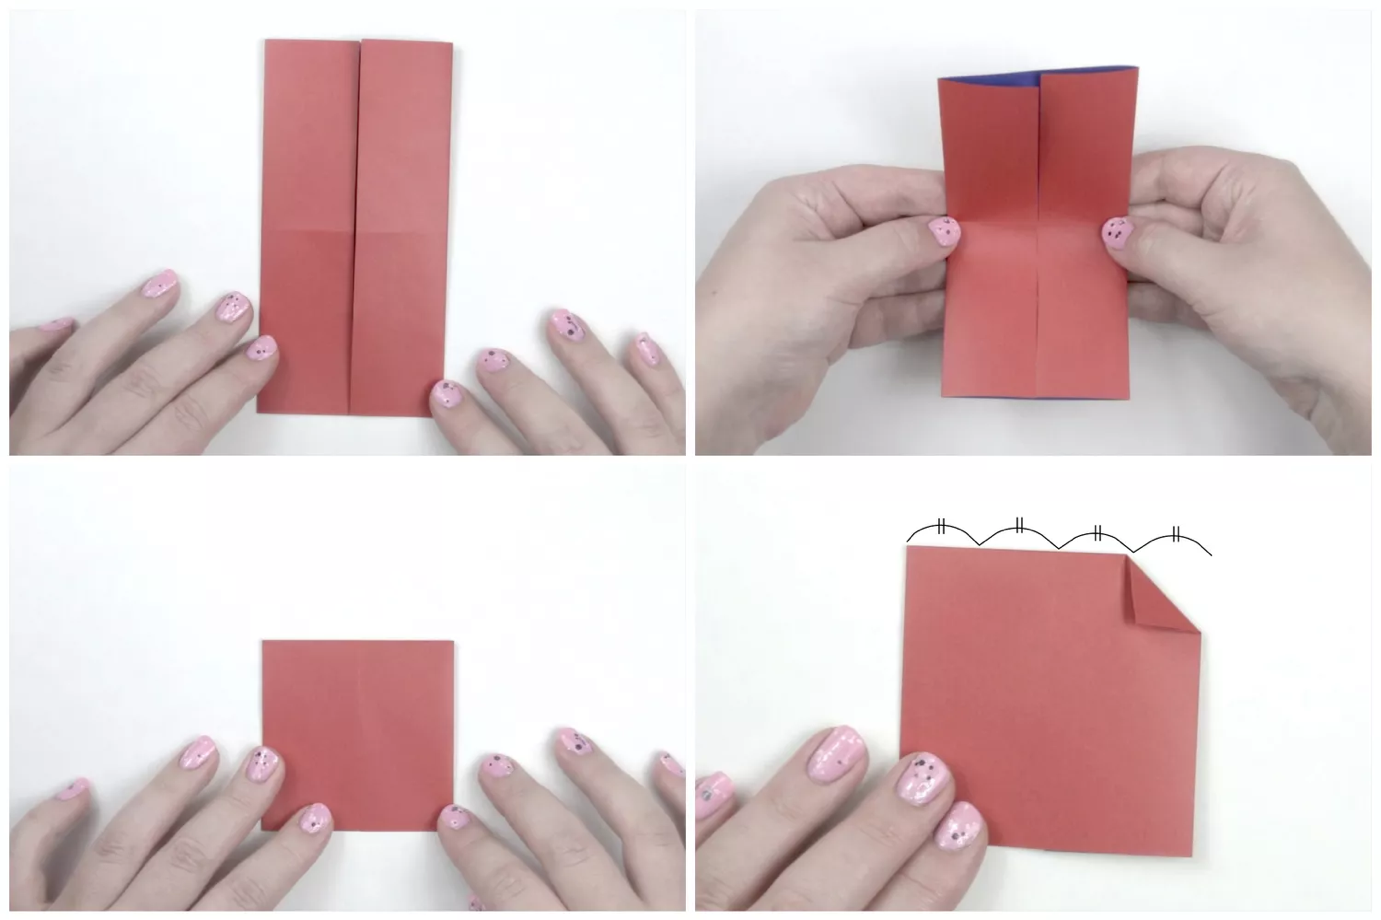
Now the real magic begins. Fold the side corners to the center along the fold lines, then join the top and bottom corners in the center as well. Your square will turn into a small diamond shape with crosshairs.
This mold is the foundation for the future heart.
Tip: Don't be afraid to adjust the lines if something is off. It's better to take a few extra seconds than to struggle with incorrect symmetry later.
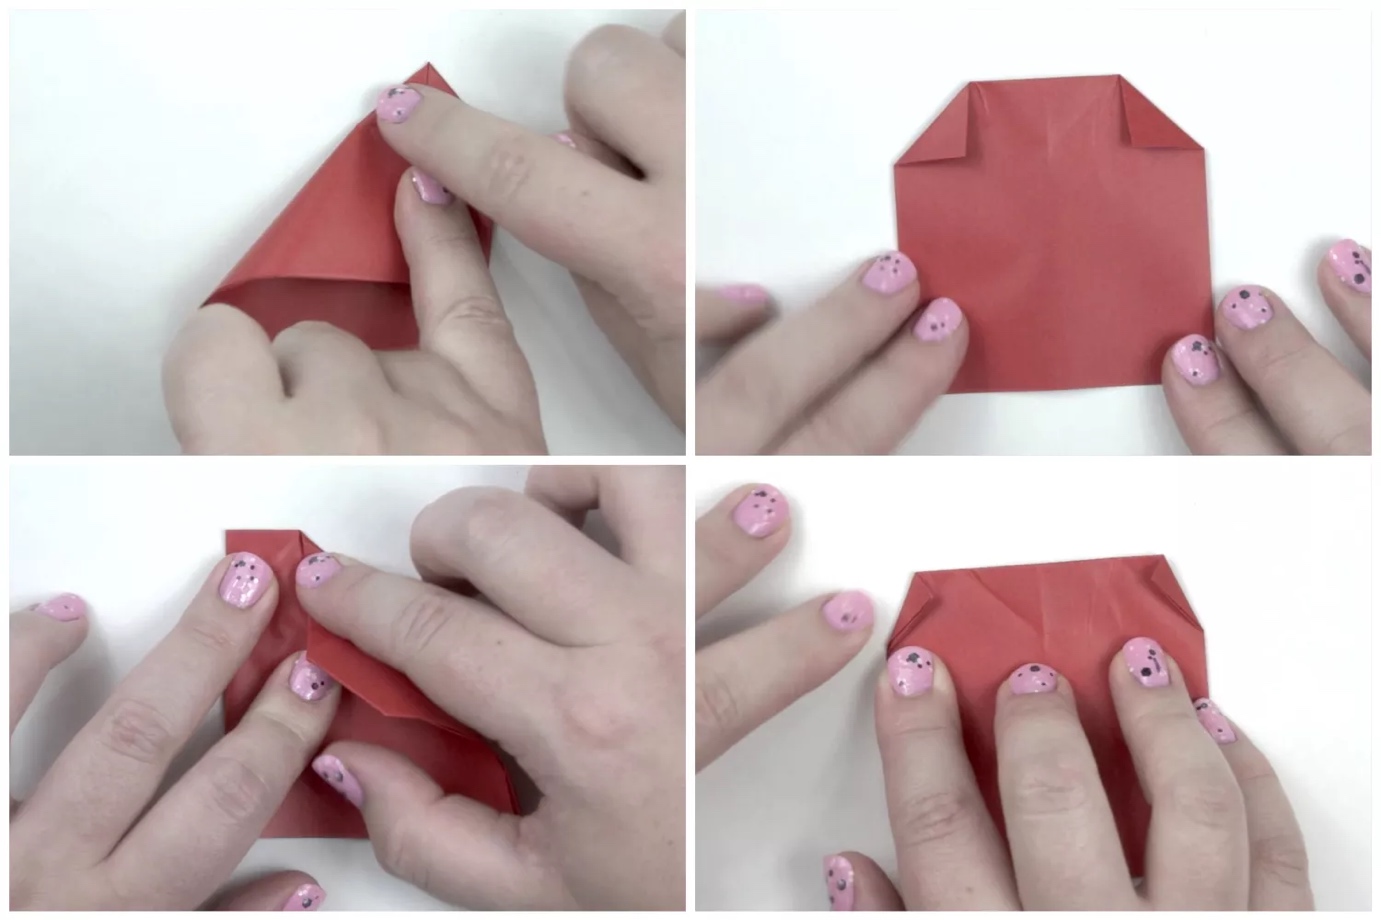
Step 4: Work with the top
Now work with the upper "triangle". Bend it down, aligning the top point of the rhombus with the center. The bend line should pass clearly through the center. This operation forms the top of the heart.
Here a familiar shape is already beginning to emerge, and you can see the paper starting to "come to life".
Step 5: Shape the bottom of the heart
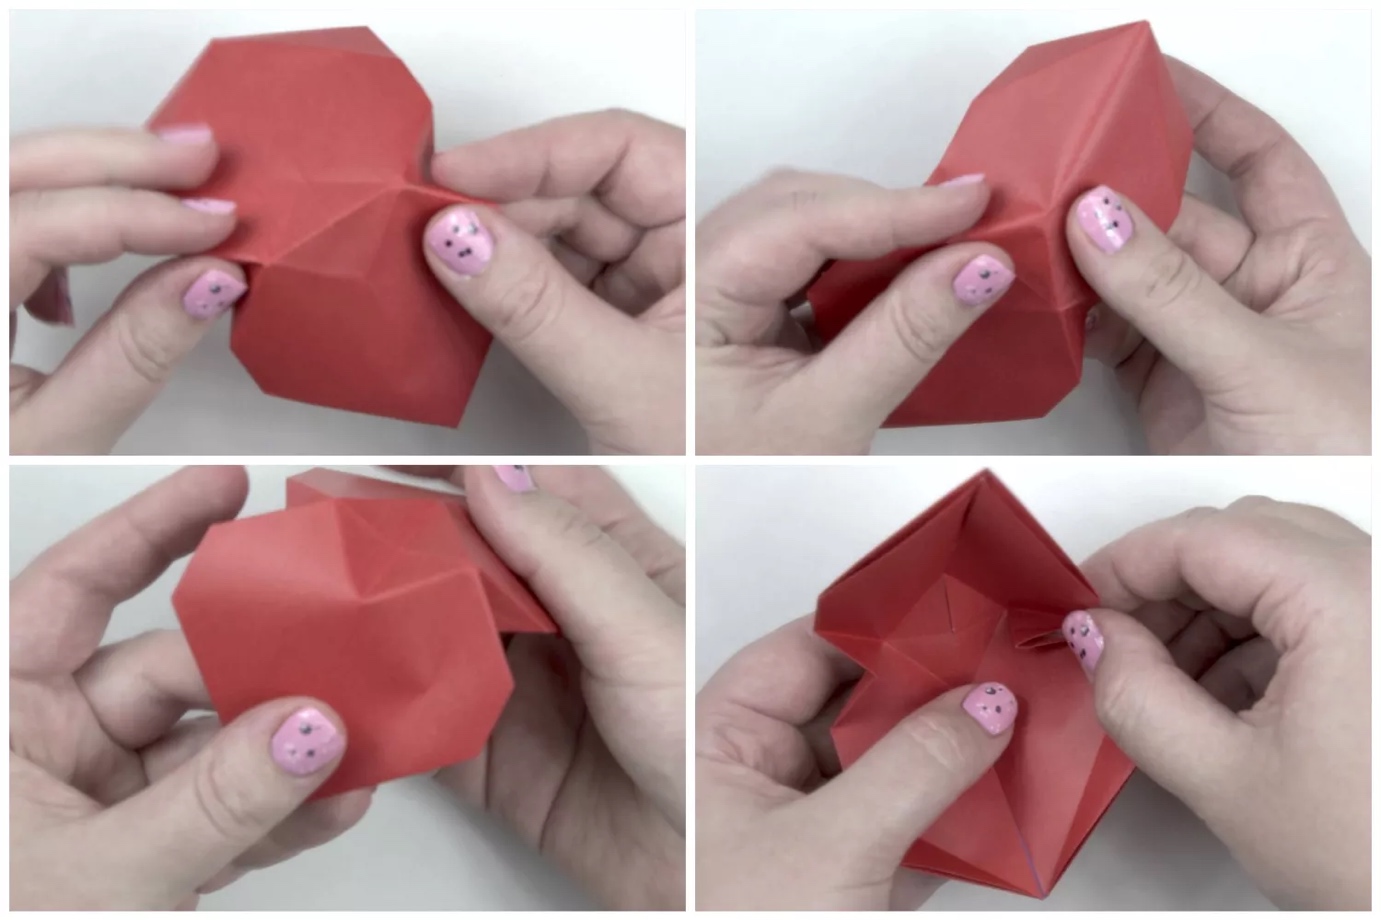
Move to the bottom part. Fold the bottom corner up to the center. You should get a pointed bottom part of the heart. Lightly iron the folds with your fingers to fix the shape.
Tip: To make the point of the heart look beautiful, try to make this fold as carefully as possible, without rushing.
Step 6: Round the edges
Now give the heart a more "soft" and natural look. To do this, tuck the small corners of the left and right edges inwards. Slightly round the upper protrusions - literally one millimeter at a time. In this way, the heart will be smoother, without sharp corners.
At this stage, your blank already looks a lot like a heart, but for now it remains flat. The fun is ahead!
Step 7: Add volume
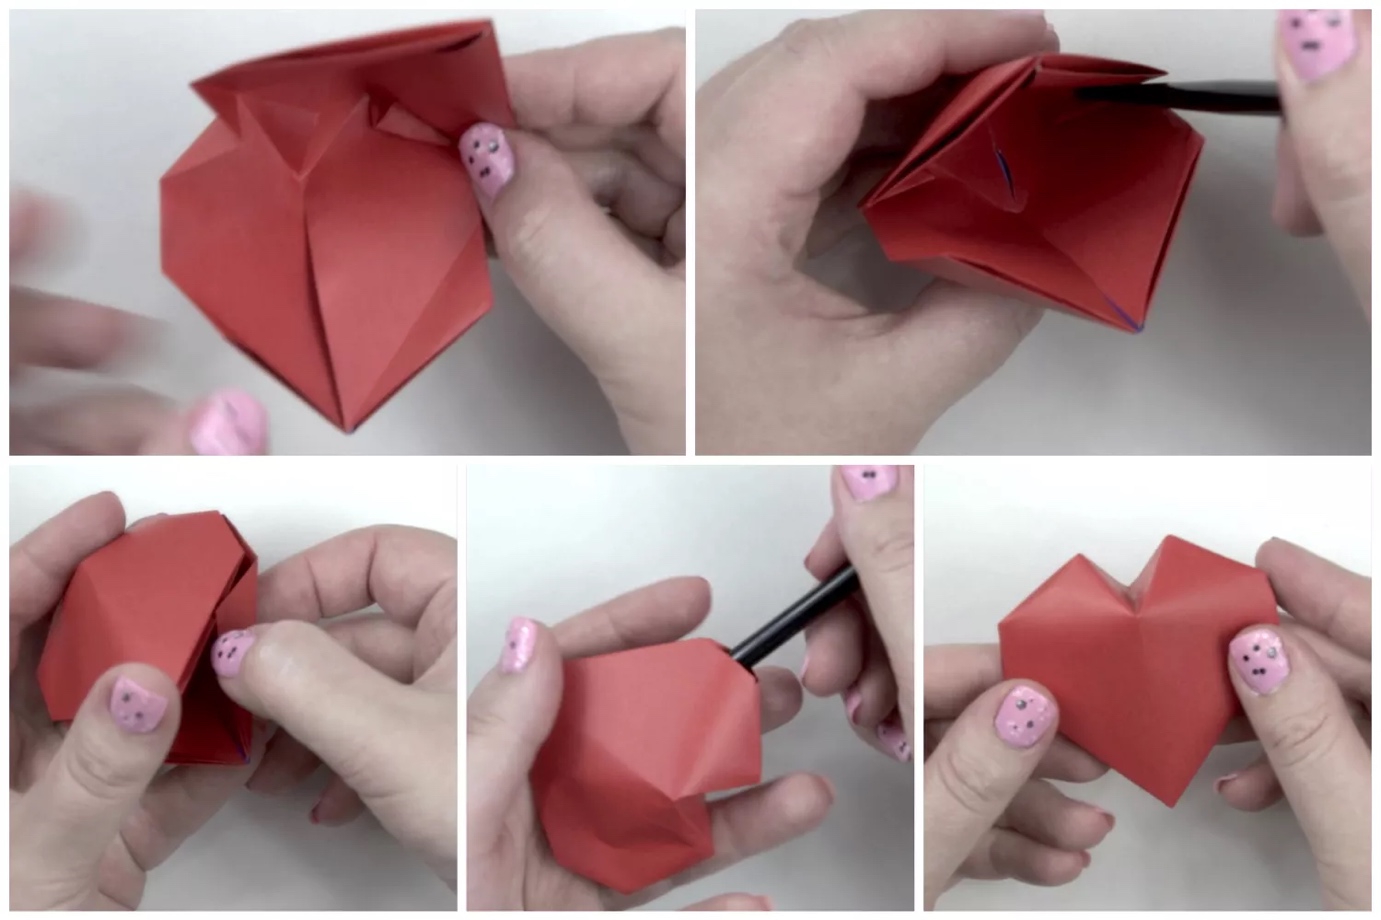
To make the heart really bulky, gently open it from the bottom. Carefully insert your finger into the small hole in the base and gently inflate the heart like a small balloon.
It is important not to hurry - too sharp movements may tear the paper. Lightly press and spread the folds to give the heart volume.
When the shape is stable, lightly correct the curves with your fingers to achieve perfect symmetry.
And there you go - your three-dimensional heart is ready!
Small, light and touching crafts will be a great gift for Valentine's Day, anniversary or just to cheer up a loved one. And if you use heavy or designer paper, these hearts can even be turned into pendants or original decor elements.
Helpful Hints:
- Use paper of different weights: thin paper for practicing, thick paper for final works.
- Experiment with sizes: small hearts are great for card decorations.
- Make several hearts of different colors - it will make a beautiful composition.


